Inviting a team member to an account
Inviting a new team member will make it easier to add team members to the project. You need to:
- Go to the section of your personal account called “Organization management.”
- Select the sub-item “Members.”
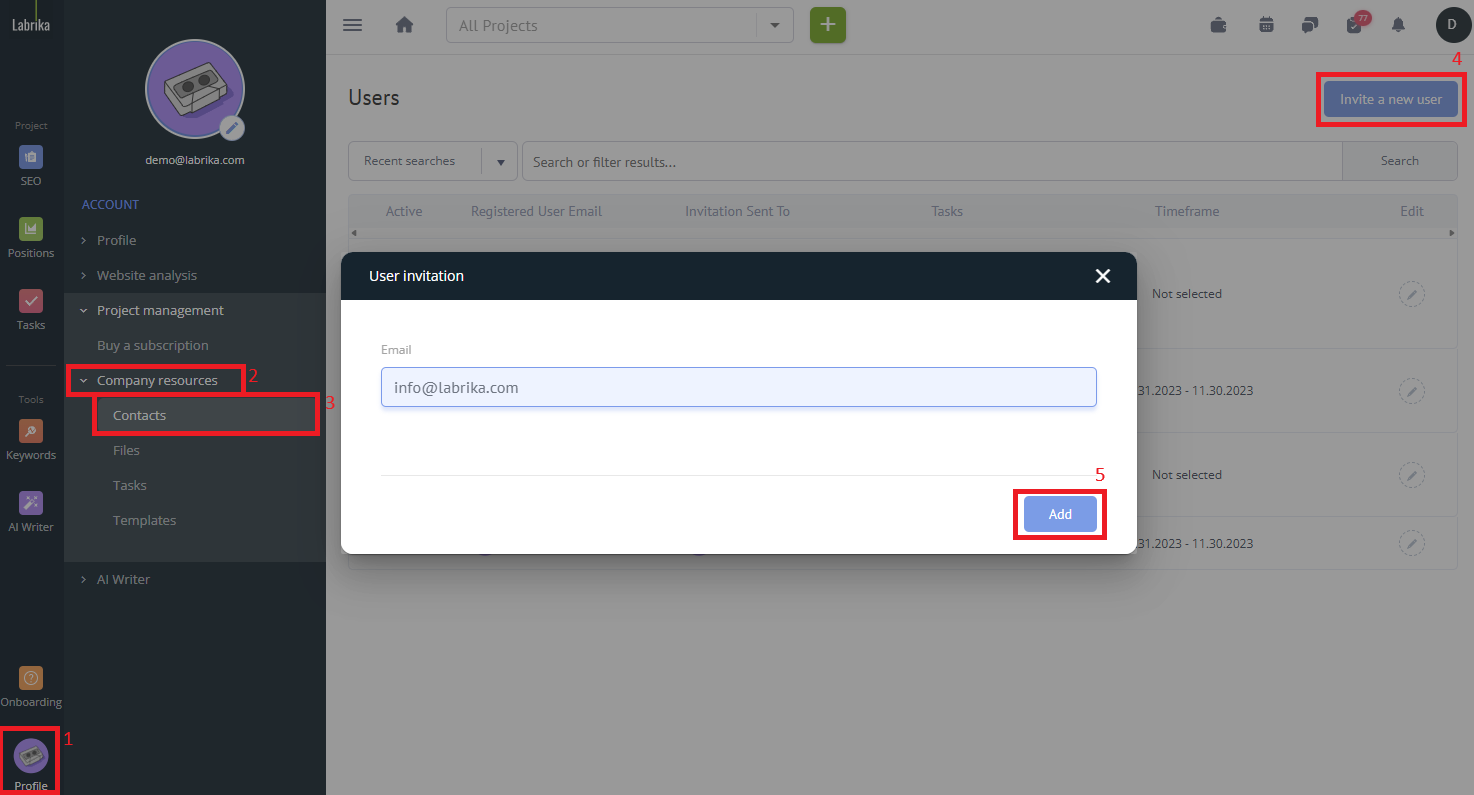
- In the “Members” section, click on the button in the upper right corner that says, “Invite a new team member to the project” (1).
- In the “Invite a new team member to your account” window, enter the user's email address (2).
- Click the save button.
Please note:
A team member can accept an invitation from any email, however, once they click on the invite link if they already have a different email address registered and authorized in the account then it will connect to the project with that email instead.
If the team member wants to change the email that they use. Say for example they are invited by their personal email, then when they click through the invite email they can simply enter a different address that they wish to use to register.
On the “Contacts” page, you can track whether the team member has accepted the invitation or not. If the team member has not accepted the invitation, you can resend it by clicking on the “invitation not accepted” button in the “busy period” column of the main table (3).
After the team member accepts the invitation, the dates of the team member's employment will be displayed in the “employment period” column of the main table (3).