
 English
expand_more
 Español
 Deutsch
 Français
 Português
 Türkçe
 Polski
 العربية
 हिन्दी

How to turn an audit into tasks with deadlines and assignees
Labrika turns audit findings into a prioritized action plan. Tasks link to the reports, so managers do not have to copy errors and page URLs into a separate list. In the same project, you can invite your team, set deadlines and track delivery in Kanban or a Gantt chart.
Create a board from an analysis
Open a website with a completed audit. Generation uses the latest analysis; if it is more than 30 days old, run a fresh check first. In “Boards”, click “+ Create a board”, choose “Generate a board based on a website analysis”, enter a name and click “Create”.
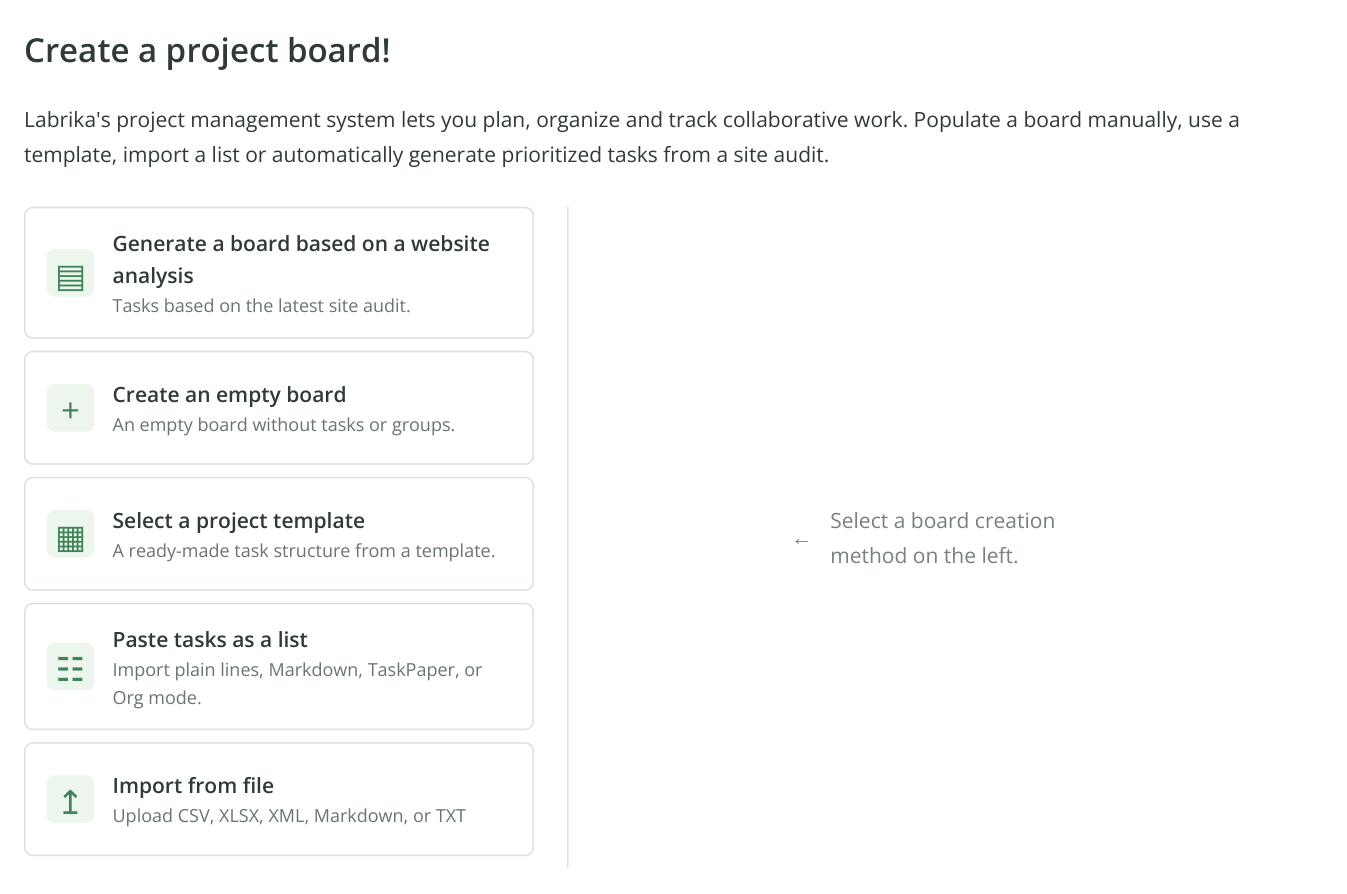
1. Part of the board creation screen: methods appear on the left, and the selected workflow opens on the right. Click “Generate a board based on a website analysis”, then name the board in the dialog.
The generated plan appears in “Tasks”. Labrika has already prioritized it based on the problems found. For example, restoring unavailable pages and removing indexing barriers take priority over less urgent improvements.
After a first audit, a business owner can move straight from findings to a work queue. Agencies can use the same process to onboard a client, while in-house SEO teams can hand developers specific assignments.
Open a task and its supporting data
Click a task name to read its description. The “Report” column opens the findings; “Help” opens guidance on the issue. “Importance” and “Complexity” help you choose an assignee and assess the work.
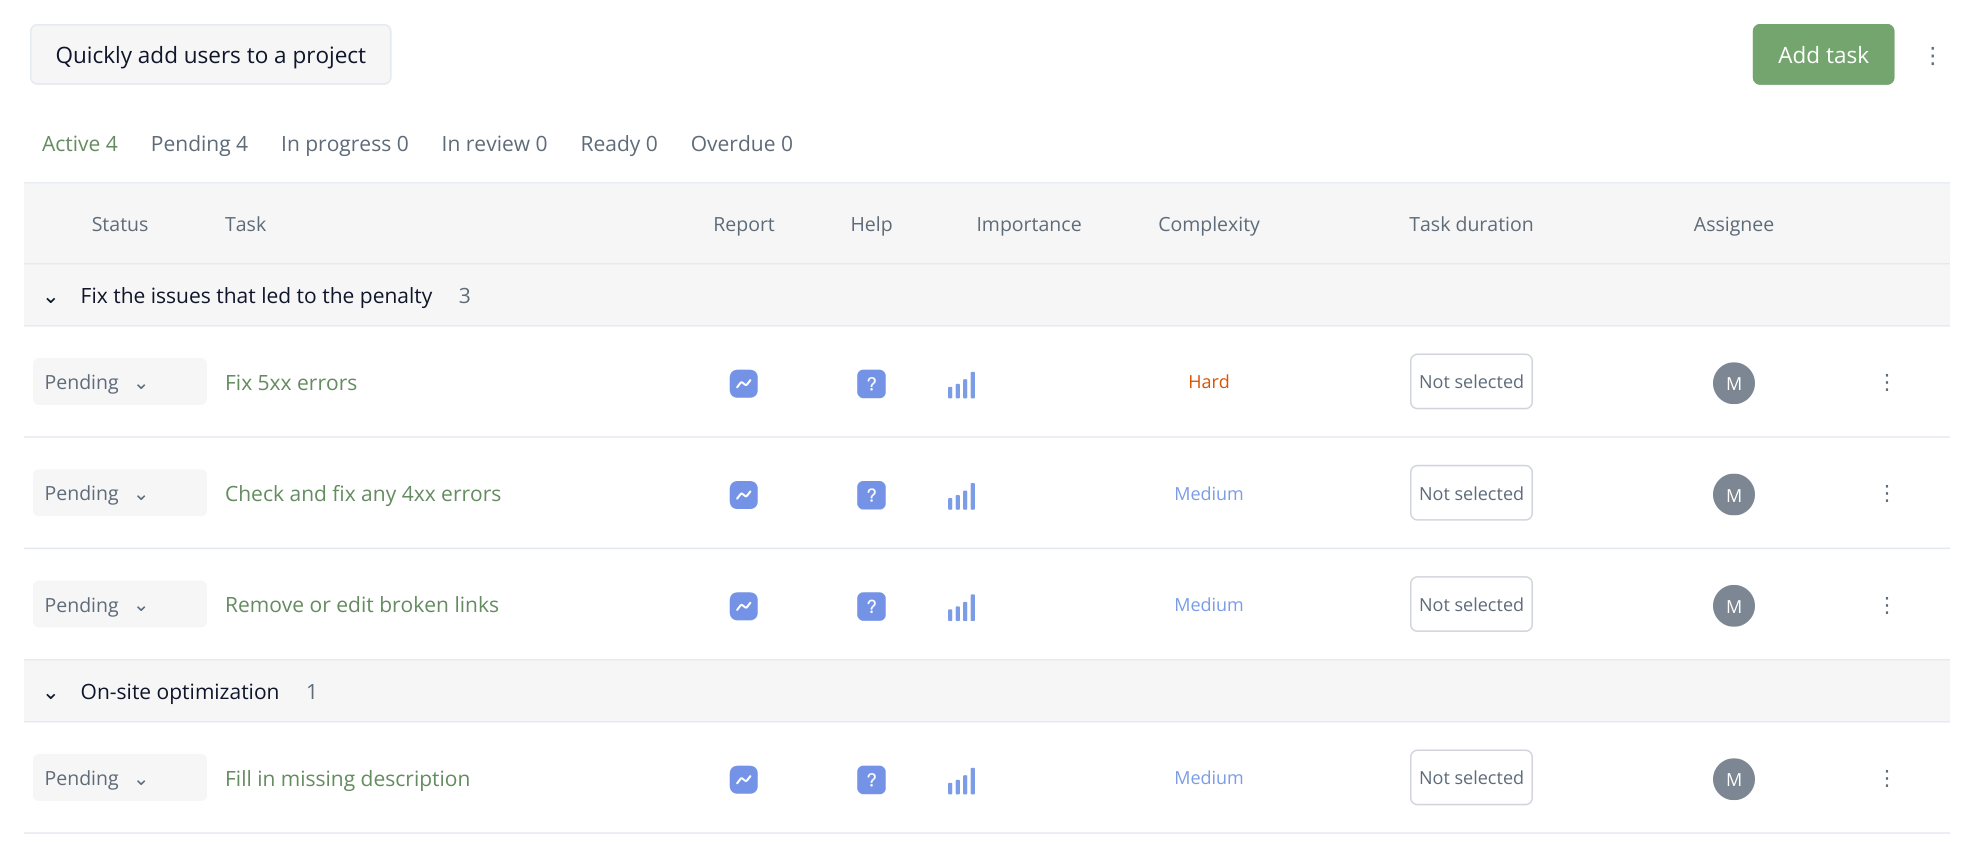
2. Part of a generated plan with illustrative store tasks. Generation sets their priority order; each row links to its report, help and task. The team assigns deadlines after creating the plan.
For example, a 5xx task links to the affected URLs. The developer sees which pages are unavailable, and the manager can note that some are categories used by a live ad campaign. There is no need to copy the entire report manually.
For a content team, a missing Description task opens the relevant page selection. The writer sees the catalog's exact scope of work and can discuss the result in the same card.
Add team members and assign owners
The owner opens “Members” → “Invite a new team member to the project” on the board. Select a colleague in “User”; for a new contact, enter an email in “Enter email for new user” and click “Create”. Then choose “Project role” and save the member. In a task card, “Assignee” lets you assign the added person; the star labeled “Mark the team member as responsible for the task” identifies the owner when several people are assigned.
Which role to choose
| Role | Tasks they can see | What they can do | Who it suits |
|---|---|---|---|
| Owner | All tasks | Creates the board, invites people and manages roles, tasks and dates. Accepts completed work and can rename or delete the board. | The board creator; this role is assigned automatically. |
| Administrator | All tasks | Assigns work, changes dates, accepts results and manages existing members. The owner invites new people. | A project manager who needs the overall Kanban view. |
| Specialist | Tasks assigned to them and tasks they created | Creates tasks for themselves and other members. Edits descriptions, dates and assignees on their own tasks. Submits completed work for review. | An SEO specialist who also assigns work to developers or editors. |
| Assignee | Only tasks assigned to them | Comments, attaches files, checks off task items and changes working status. Cannot create tasks or change their dates or assignees. | A developer or editor working from existing assignments. |
| Observer | Only tasks assigned to them | Reads task content, dates and attachments. Cannot post in the chat, edit tasks or change their status. | A client who needs to view selected work. |
Kanban is available to the owner and administrator. Specialists and assignees work through their task lists and cards, moving completed work to “Review”. The owner or administrator moves it to “Ready” after approval.
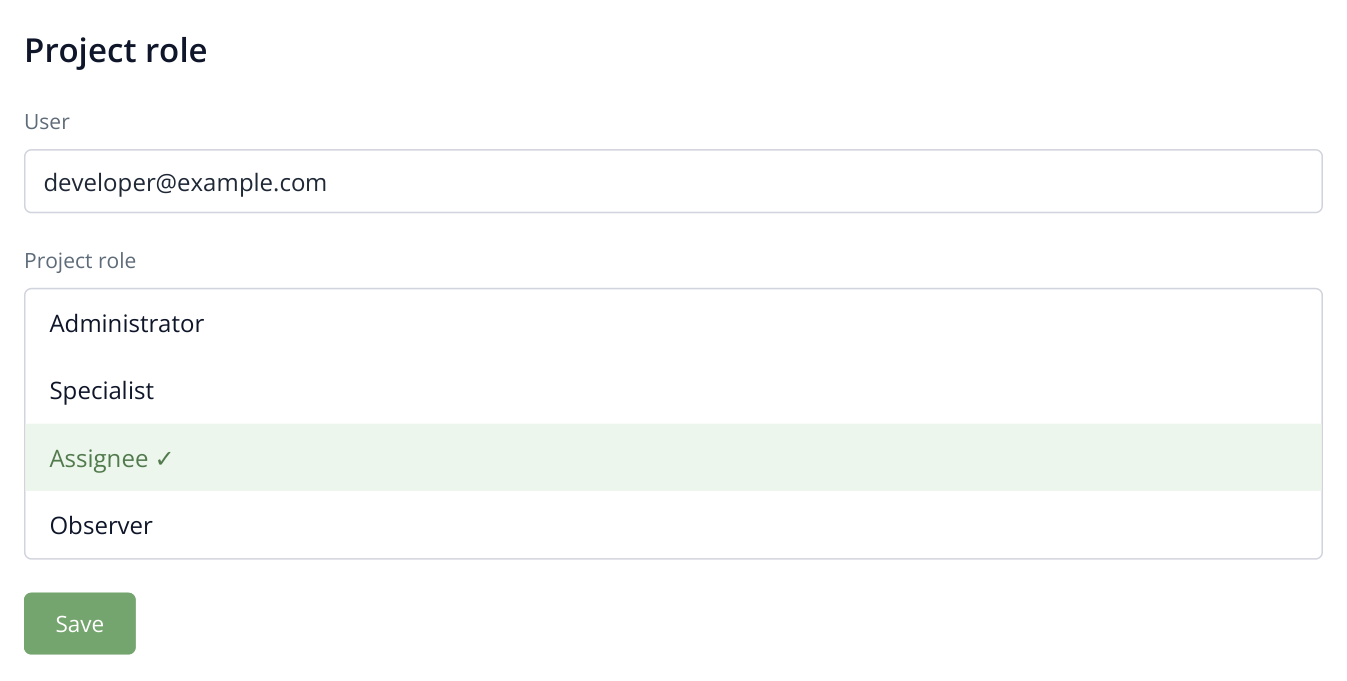
3. Choosing a role for an invited developer. The owner was set when the board was created; the list selects the new member's role.
How a colleague accepts the invitation and starts work
- After you save a new member, Labrika sends an email to the address entered. In the “Project sharing invitation” email, the employee clicks “Accept invitation”.
- If they are not signed in, they click “Go to authorization” and sign in to Labrika or create an account. They should use the account they intend to work from.
- If the “Gaining access to a project” screen appears after sign-in, they click “Accept invitation”. The invitation is linked to their account.
- In their account, they open the invited project, then “Tasks”, the board and its “Tasks” list. The owner or administrator assigns tasks to them, and those tasks appear in their working list.
For the first assignment, open its name, read the description and linked report, then set the status to “In progress”. After completing the fix, leave a comment with the result and choose “Review”. The manager sees the updated status on the shared board.
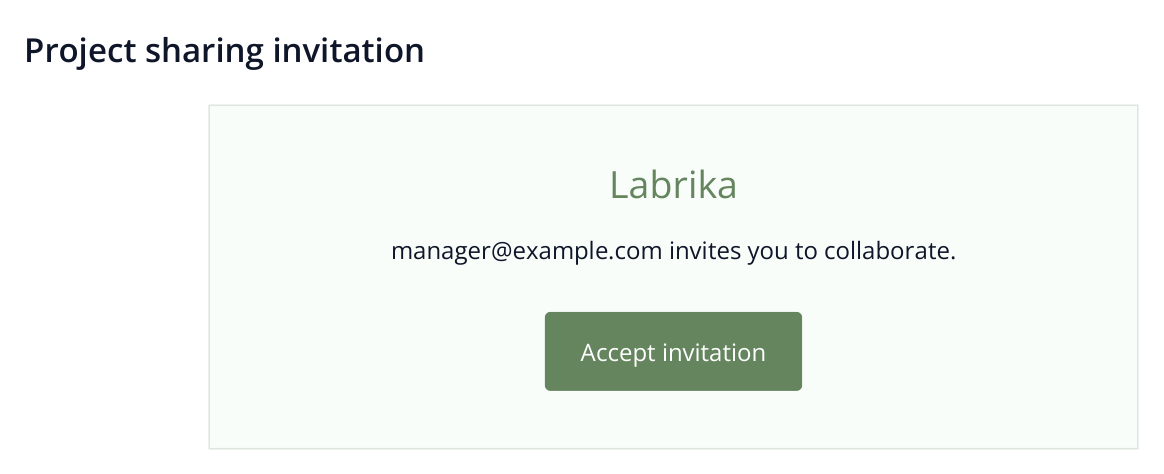
4. The invitation goes to the email entered when the contact was added. The button opens the acceptance process; the illustration shows a sample email.
If the email is missing, check the address and “Spam” folder. The owner can open “Members” and click the contact's “Invitation not accepted” status. In “Send Invitation”, click “Copy link to clipboard” and send that link to the colleague. Email invitations can be resent once a day. A verified contact uses their existing account and does not need to register again.
Set start and end dates. For example, the developer fixes 5xx errors on November 9–10, then an SEO specialist checks the published result. You can assign several similar tasks to one person in bulk.
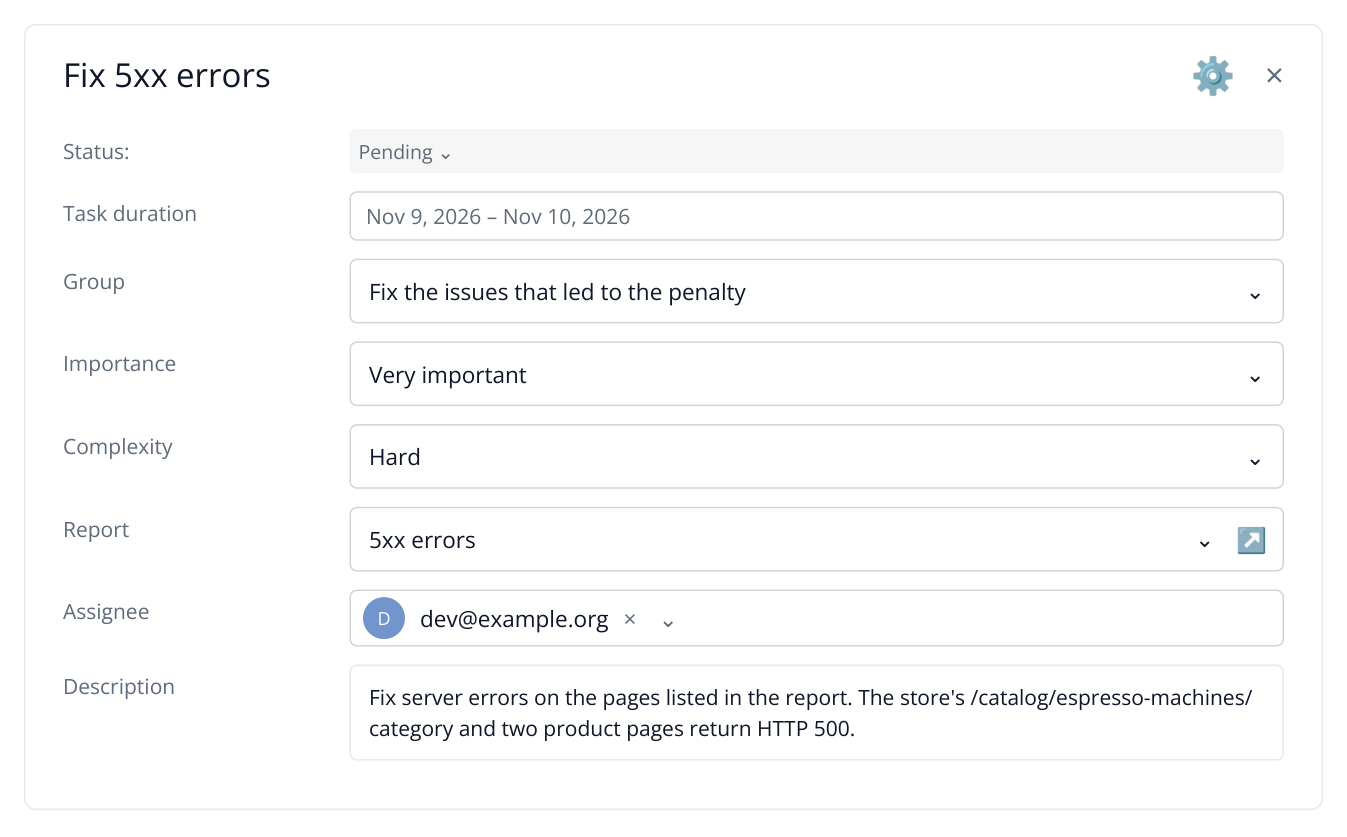
5. Part of the “Fix 5xx errors” task: a developer is assigned and the dates are November 9–10. The description and report link remain with the assignment.
To assign tasks in bulk, click “Quickly add users to a project” above the task list. In “Quick distribution of tasks”, select the tasks and assignee, then click “Save”. For example, assign 5xx errors and links to a developer together, then page descriptions to a writer. Before a large batch, review “What team members are working on” to account for existing commitments.
Manage day-to-day work with Kanban
The owner or administrator opens “Kanban” and moves cards through “Pending” → “In progress” → “Review” → “Ready”. Assignees and specialists change their working status in their own task lists or cards. Comments, links to fixes and files stay in the task, so the manager can review the result with its context.
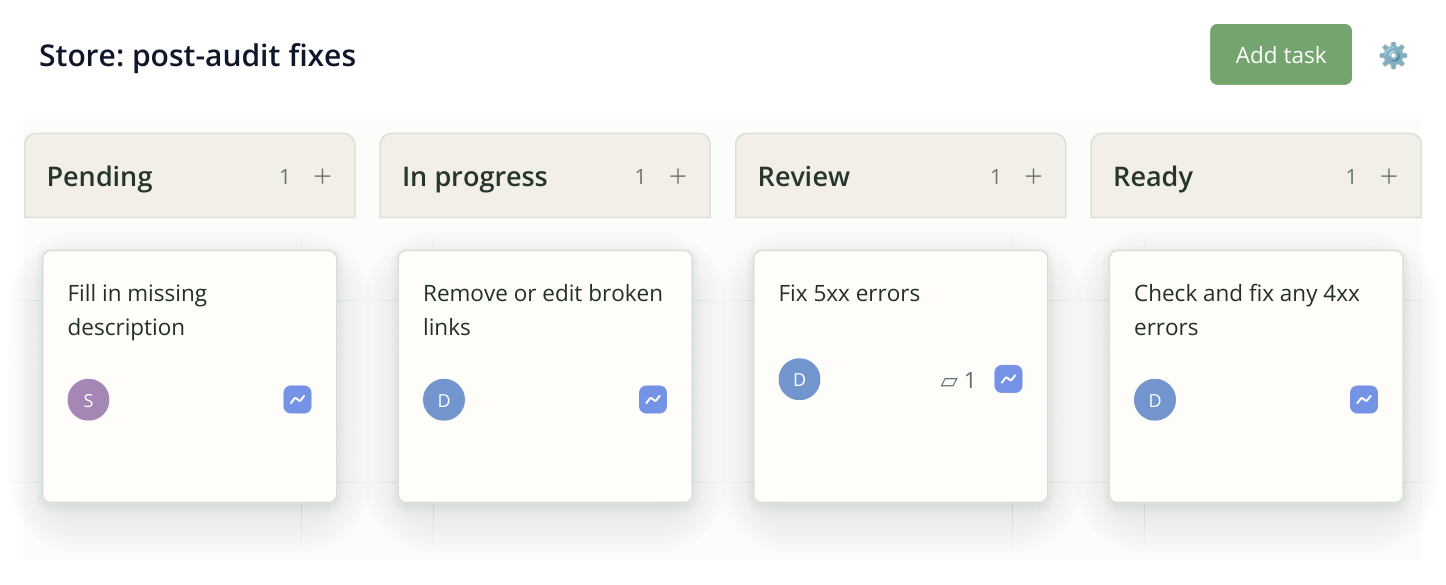
6. The same plan in Kanban: descriptions are still pending, the developer is fixing links, 5xx errors are awaiting review and the 4xx task is complete.
The assignee moves finished work to “In review” and leaves a link to the result. The board owner or administrator checks it and moves the card to “Ready”, or returns it with specific feedback. For example, after a link fix, the SEO specialist checks the URLs in a fresh audit before the manager approves the task.
An agency client can follow progress within their access permissions: what is in progress, awaiting review or complete. This is especially useful when technical fixes, content and external placements run in parallel.
Schedule work on a Gantt chart
Open “Gantt chart”. Tasks with dates appear on the calendar. Drag a bar to reschedule the work, or drag its edge to change the duration. Double-click to open the card. For example, copywriting can run alongside a template fix, with publication scheduled after both are complete.
This suits a store section launch, a website migration or a set of landing pages for an ad campaign. The agreed plan stays in one project: the list shows details, Kanban shows progress and the chart shows dates.
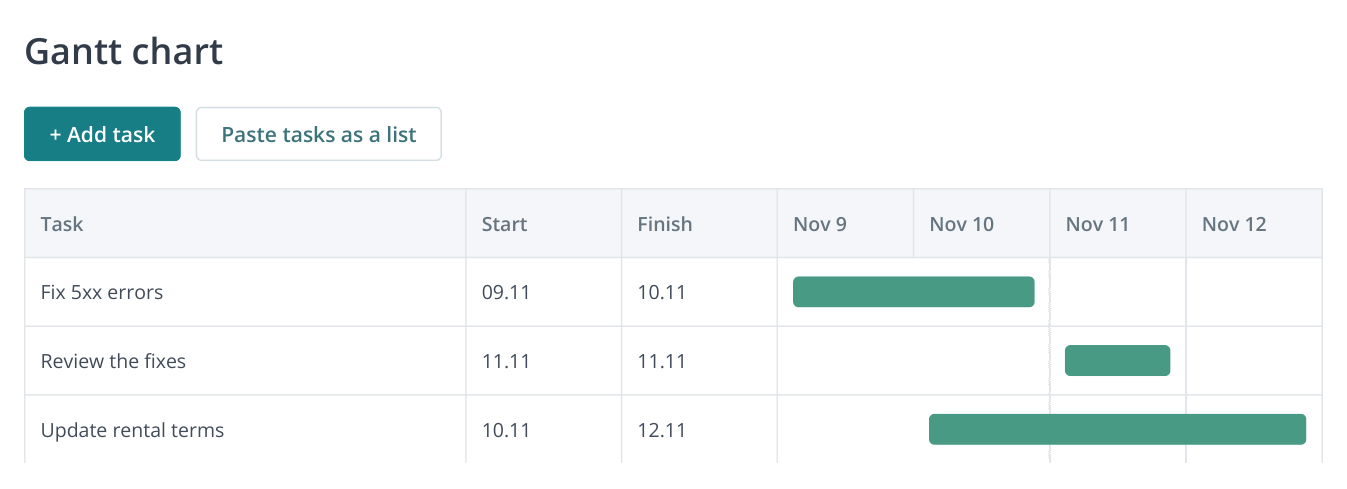
7. Part of the Gantt chart: names and dates are on the left, calendar bars on the right. Review follows the fix, while rental terms are updated in parallel. Scroll on phones to read the calendar.
Share reports and discuss the work in the task
A task created from an audit already has a linked report. Open its card and the “Report” section: the assignee can access the URL list and data behind the assignment. For a broken-link task, the developer immediately sees which addresses need attention.
Add the employee to the board and assign the task. The project management system grants access to linked reports based on membership and permissions. If a client needs to browse reports for the whole website independently, use a separate website project invitation with the appropriate access checkboxes.
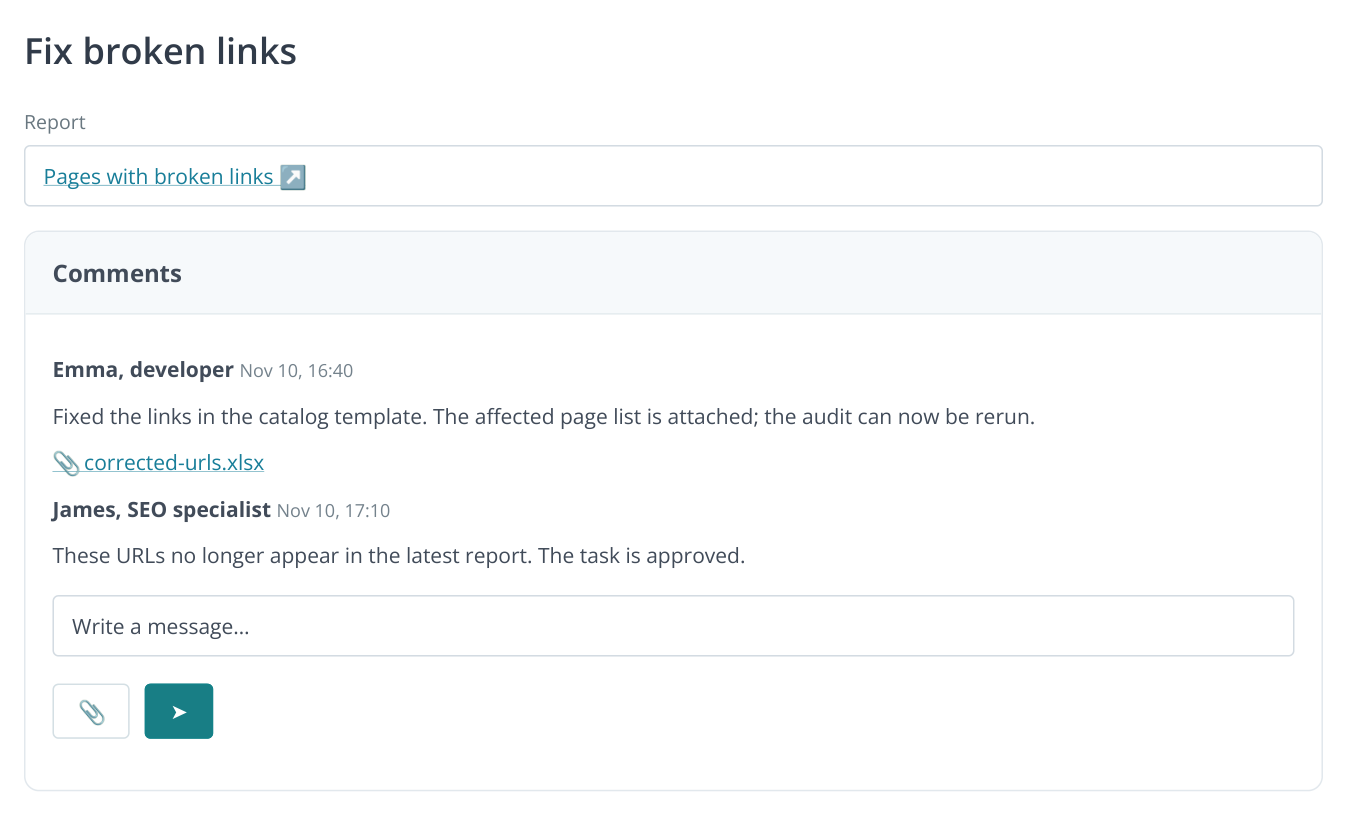
8. Part of a task card: the linked report and discussion with an attachment stay alongside the assignment. Names and messages are illustrative.
Use “Comments” in the card to discuss a particular fix; attach a file with the paperclip icon. A private chat is available for general board discussion. Attach a file, URL or comparison link to the relevant task so the context remains available during sign-off.
Verify completion with another check
After a technical fix, rerun the audit and review the affected URLs. For changes to text, meta tags or design, use monitoring with screenshots. Add the result link to the task and close it after verification.
At the next stage, the team continues with the existing plan and discussion history. The prioritized action plan guide provides a detailed example of inviting members, assigning tasks in bulk and scheduling work.