
 English
expand_more
 Español
 Deutsch
 Français
 Português
 Türkçe
 Polski
 العربية
 हिन्दी

How to schedule weekly audits and critical issue alerts
Labrika supports two kinds of recurring checks: scheduled full website audits and change monitoring for selected pages. Full audits find technical and SEO issues across your website. Change monitoring helps you quickly detect failures on important landing pages. This guide sets up each workflow separately, including creating a monitoring project and choosing which events trigger an email.
1. A weekly audit of your entire website
Set up automatic runs
- Open the website's settings and go to “Set up a report schedule”.
- Under “Complete website audit:”, choose “Several times a week”. For a weekly audit, select one day, such as Monday.
- Click “Save”. Labrika will automatically start the analysis on that day.
A full audit includes technical and SEO checks as well as keyword rank tracking. To check rankings more frequently between audits, select additional days under “Position collection:”. For example, audit the whole website on Mondays and collect additional ranking measurements on Wednesdays and Fridays.
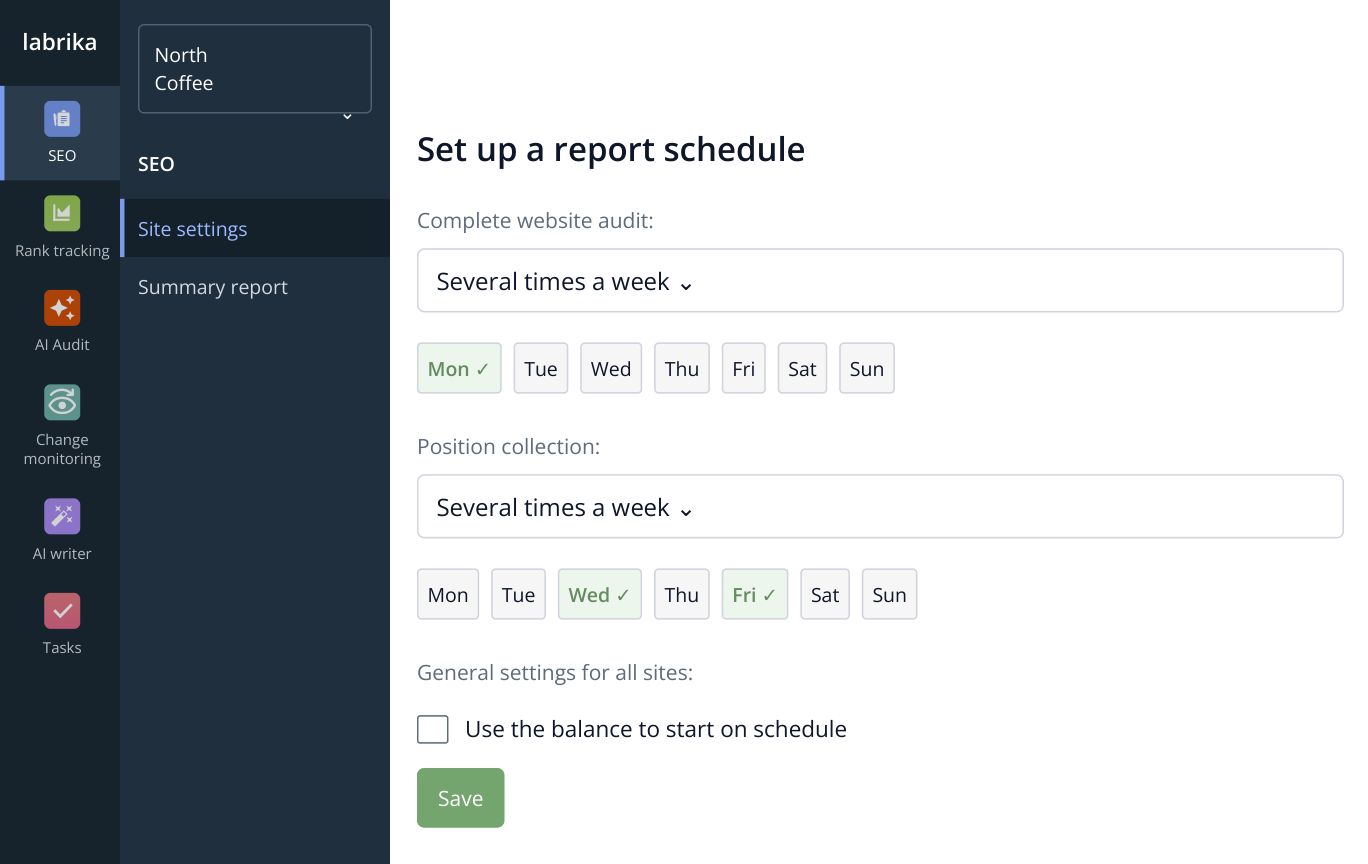
1. Open “SEO” → “Site settings” and find “Set up a report schedule”. The full audit runs on Mondays; additional ranking checks run on Wednesdays and Fridays. This interface excerpt uses sample data.
For a store with frequent catalog updates, select several full-audit days. Agencies managing dozens of websites can open “Scheduled runs”, select projects and choose “Edit selected” → “Full website audit” to apply a shared schedule to the selected group.
Checks use your subscription credits. “Use the balance to start on schedule” allows Labrika to pay for any additional credits from your account balance. Enable it if you want scheduled checks to continue after your included credits run out.
Use the audit findings to make improvements
Each run updates the “Technical audit” and “SEO audit” reports. Recurring checks are especially useful for websites that change regularly:
| Business situation | What Labrika helps detect |
|---|---|
| An online store updates its catalog and product page templates | Duplicate or missing titles and descriptions, duplicate pages, incorrect canonicals and problems that prevent products from being discoverable in search. |
| A developer changes the CMS, URLs or website structure | Redirect chains, broken internal links, indexing restrictions, sitemap.xml inconsistencies and robots.txt errors. |
| A marketer launches new landing pages | Slow pages, HTML errors, mobile optimization problems and content issues to address before scaling ad spend. |
| An agency oversees multiple client websites | New issues and changes between checks, showing where the team needs to act and what improved after the fixes. |
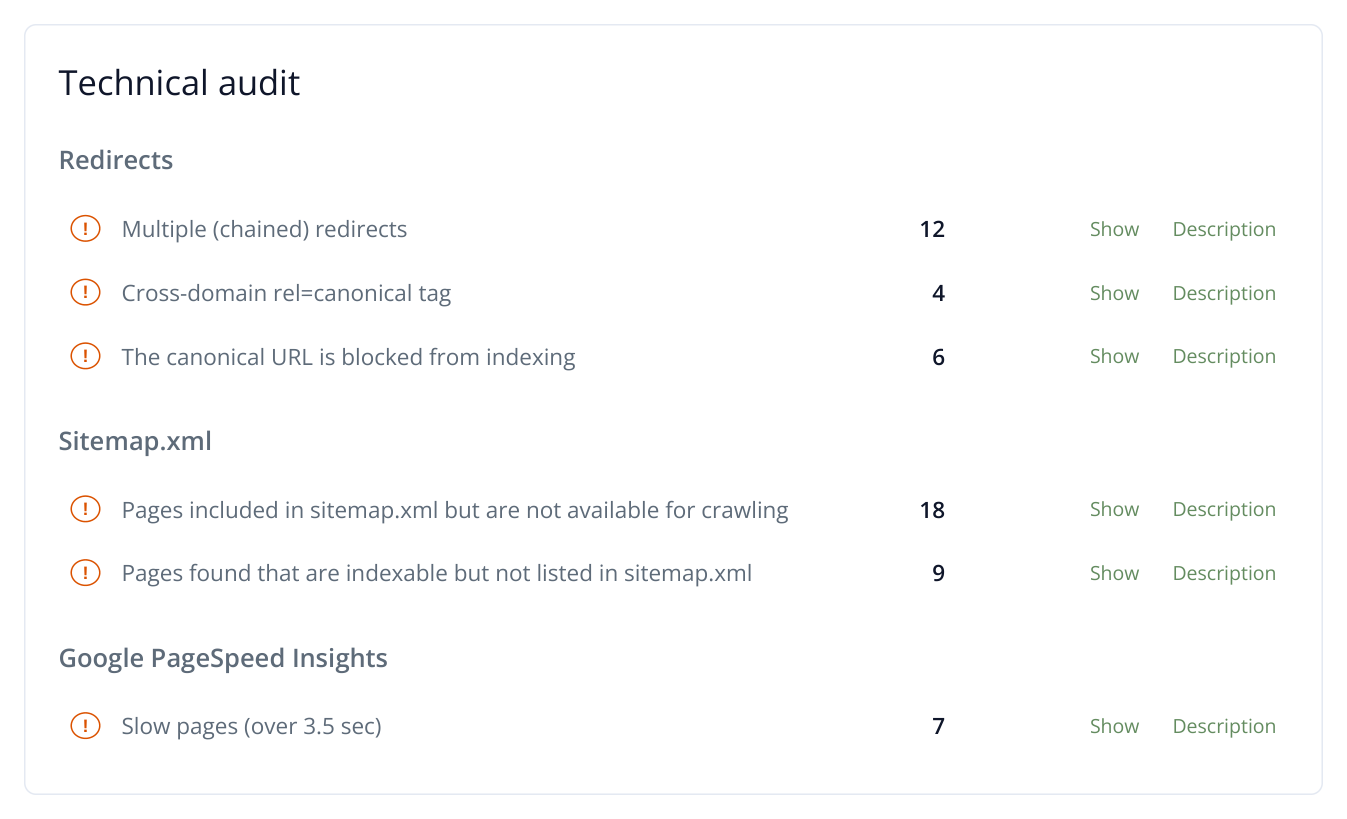
2. Technical audit excerpts with sample store data: canonicals, redirects, sitemap.xml and speed. “Show” opens the related findings; “Description” explains the check.
Click “Show” next to an issue to open its findings. For example, “Cross-domain rel=canonical tag” lists pages whose canonical tags point to another domain, giving you the exact URLs affected by a template error.
Audit history lets you compare results before and after changes. To assign work to your team, generate a prioritized action plan from the audit findings.
Choose your audit notifications
In your account settings, open “Edit subscribe settings”. “Send notification after full site analysis (recommended)” enables an audit results email showing the number of SEO and technical issues, changes in those counts, keyword rankings and important problems. If a primary search engine is configured, the email also includes an action plan. Website owners can keep track of project health, and agencies can start the week with current findings.
Open “Profile” in the left menu, then “Edit subscribe settings”. These settings control audit emails for the account's websites. Monitoring events have a separate recipient and trigger conditions in their rule, covered in the second part of this guide.
To receive issue notifications without a summary after every audit, clear this checkbox. Keep “Sites availability problems (recommended)” and “Low balance (for scheduled reports only)” enabled, then click “Save”.
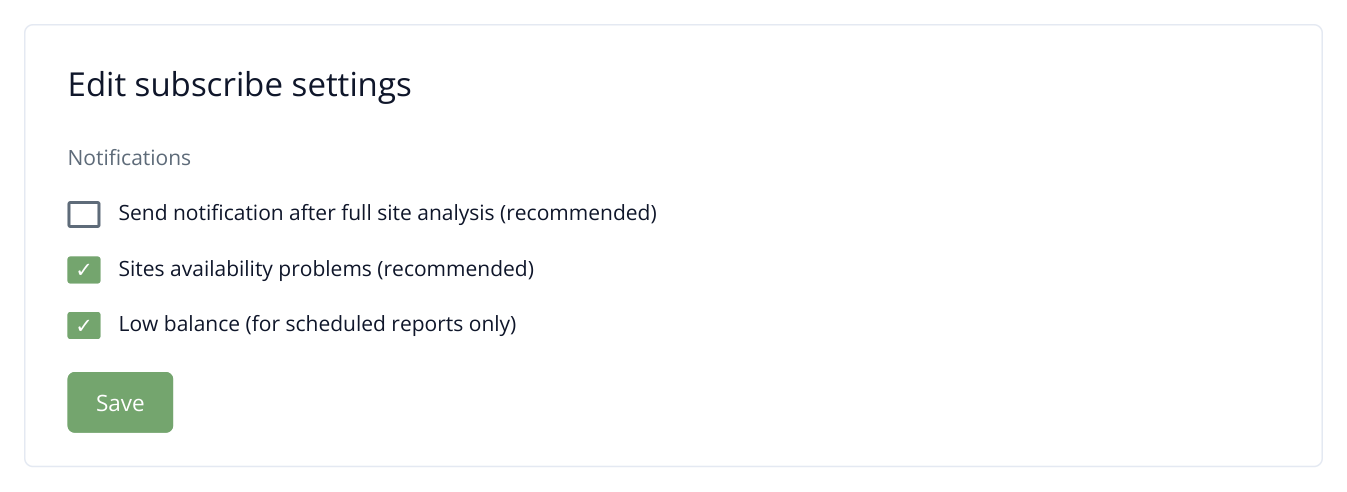
3. Settings for issue notifications: the email after each completed audit is disabled. Enable the first option if you want a weekly summary. The recipient for selected monitoring events is configured in the monitoring rule.
Detailed full-audit results remain available in the project. View completed and skipped scheduled checks under “History of scheduled launches”. When an issue notification arrives, open that website's latest audit and the report for the reported error.
2. Monitor changes on important pages
Create a separate monitoring project for advertising landing pages, popular categories and service pages. Choose the exact URLs, check frequency and email triggers, such as a missing lead form or a change to approved meta tags. The full store audit can run on Mondays while these pages are checked daily.
Create a monitoring project
- In the project list, click “Add new site”. On the tool selection screen, choose the “Monitoring” card.
- Under “Enter a name for the new site change tracking project”, enter a name such as “North Coffee — key landing pages”. Click “Create project”.
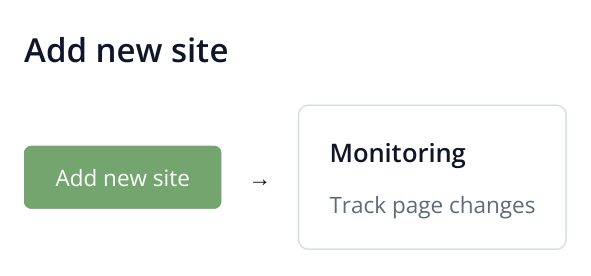
4. Starting from the project list: click “Add new site”, then choose “Monitoring” on the tool selection screen. The illustration shows elements from two consecutive screens.
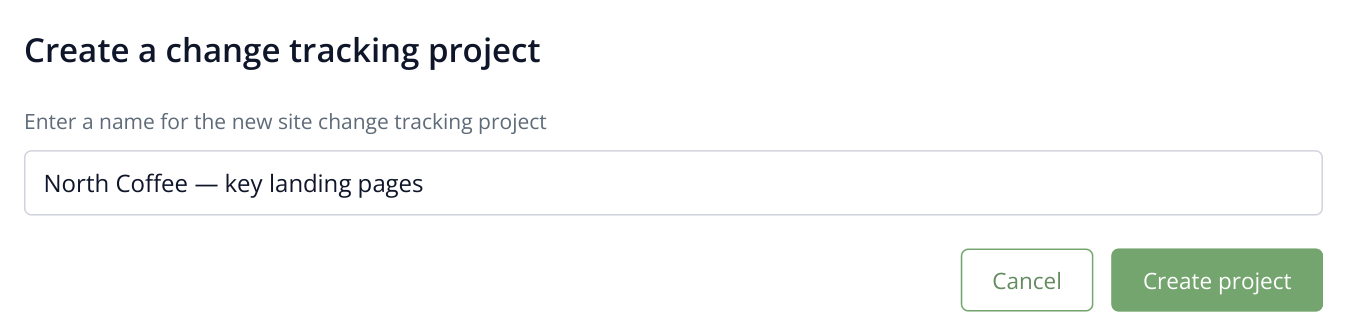
5. This step sets the project name. Add page URLs after choosing a mode and creating a rule.
On the next “Create project” screen, select “Universal monitoring” and click “Create”. This mode lets you configure the conditions for our example manually. The first rule form opens; we will complete it below. For an existing monitoring project, open the same form through “Change monitoring” → “Analysis and alert rules” → “Add”.
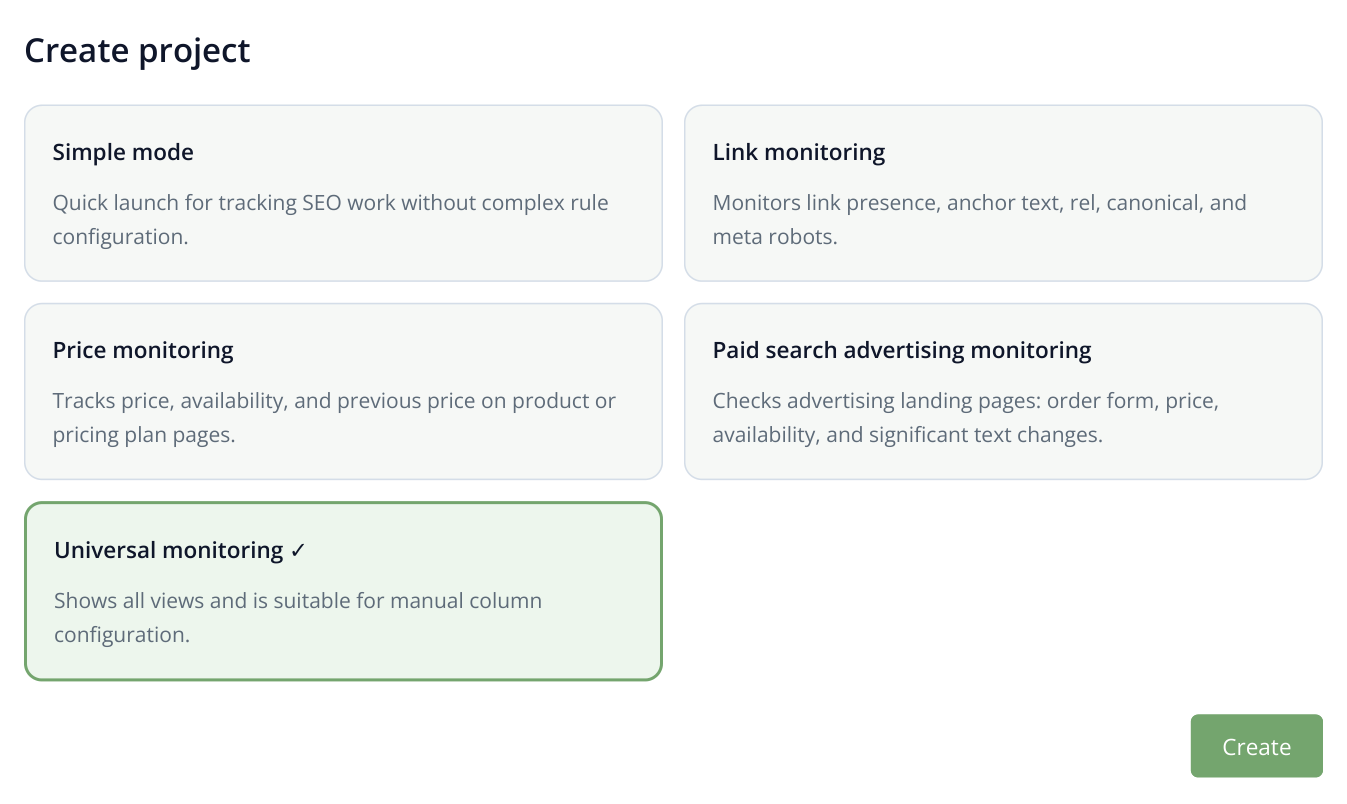
6. “Universal monitoring” is selected. Clicking “Create” opens the first rule; the other modes provide preset monitoring workflows.
Choose which events trigger emails
Enter a descriptive “Rule name”, such as “Landing pages: leads and SEO”. Under “Notification email”, enter the email address of the person responsible for responding. You can then apply the same rule to several pages.
Choose conditions that matter for these pages:
- A title or description changes. Set “Meta tag change threshold, %” to 0 to detect any change. This is useful for landing pages with approved meta tags: a template update will not go unnoticed.
- The text or HTML changes substantially. Use “Content change threshold, %” and “HTML change threshold, %”. A threshold of 20, for example, tracks larger changes without reacting to every small edit. Adjust this example setting to your website's update patterns.
- A page becomes slower. Set a limit in “Load time over, sec.”, such as 5 seconds. A check exceeding that limit creates a notification trigger.
- You need a visual history. Enable “Take desktop screenshot” and “Take mobile screenshot”. The screenshots help you see what the page looked like after a change.
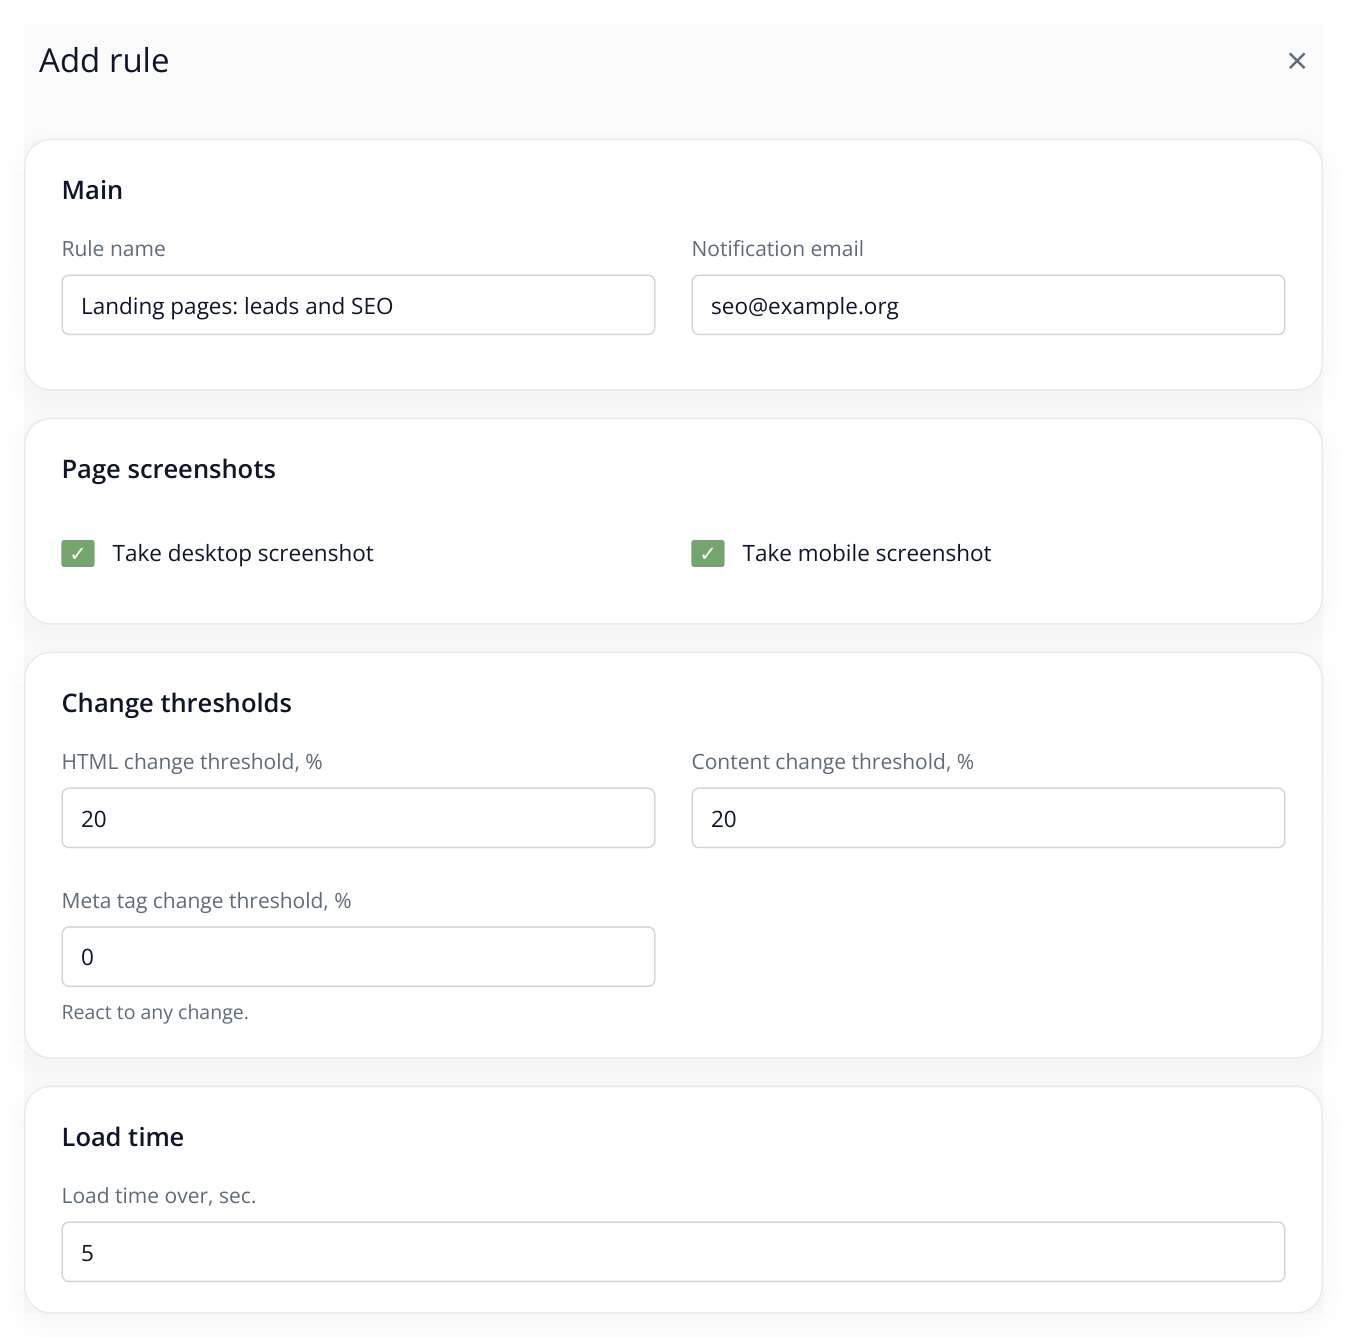
7. Sections of the same rule: HTML and content changes use your chosen threshold; any meta tag change is detected. Screenshots show the page's appearance. Adjust the example values to match how often your website changes.
You choose the business-critical events in the rule: a missing form, altered approved meta tags or an increase in loading time. For JavaScript-rendered content, enable “Parse JS”. You can add HTTP status and response size checks, for example, to detect a server error along with lost content.
Check lead forms and important page sections
Open “Advanced settings” in the rule. Here you can specify exact signs of a page problem.
Under “Text or HTML fragments that should not disappear”, add a stable HTML fragment identifying the element you need. For a form with the ID lead-form, enter id="lead-form". Labrika will notify you if that fragment disappears from the checked page. You can similarly monitor a phone number, order button or contact section.
Under “Text or HTML fragments that should not appear”, enter text from the maintenance page your CMS displays, such as “Website under maintenance”. This helps detect when visitors see a service message instead of the intended landing page.
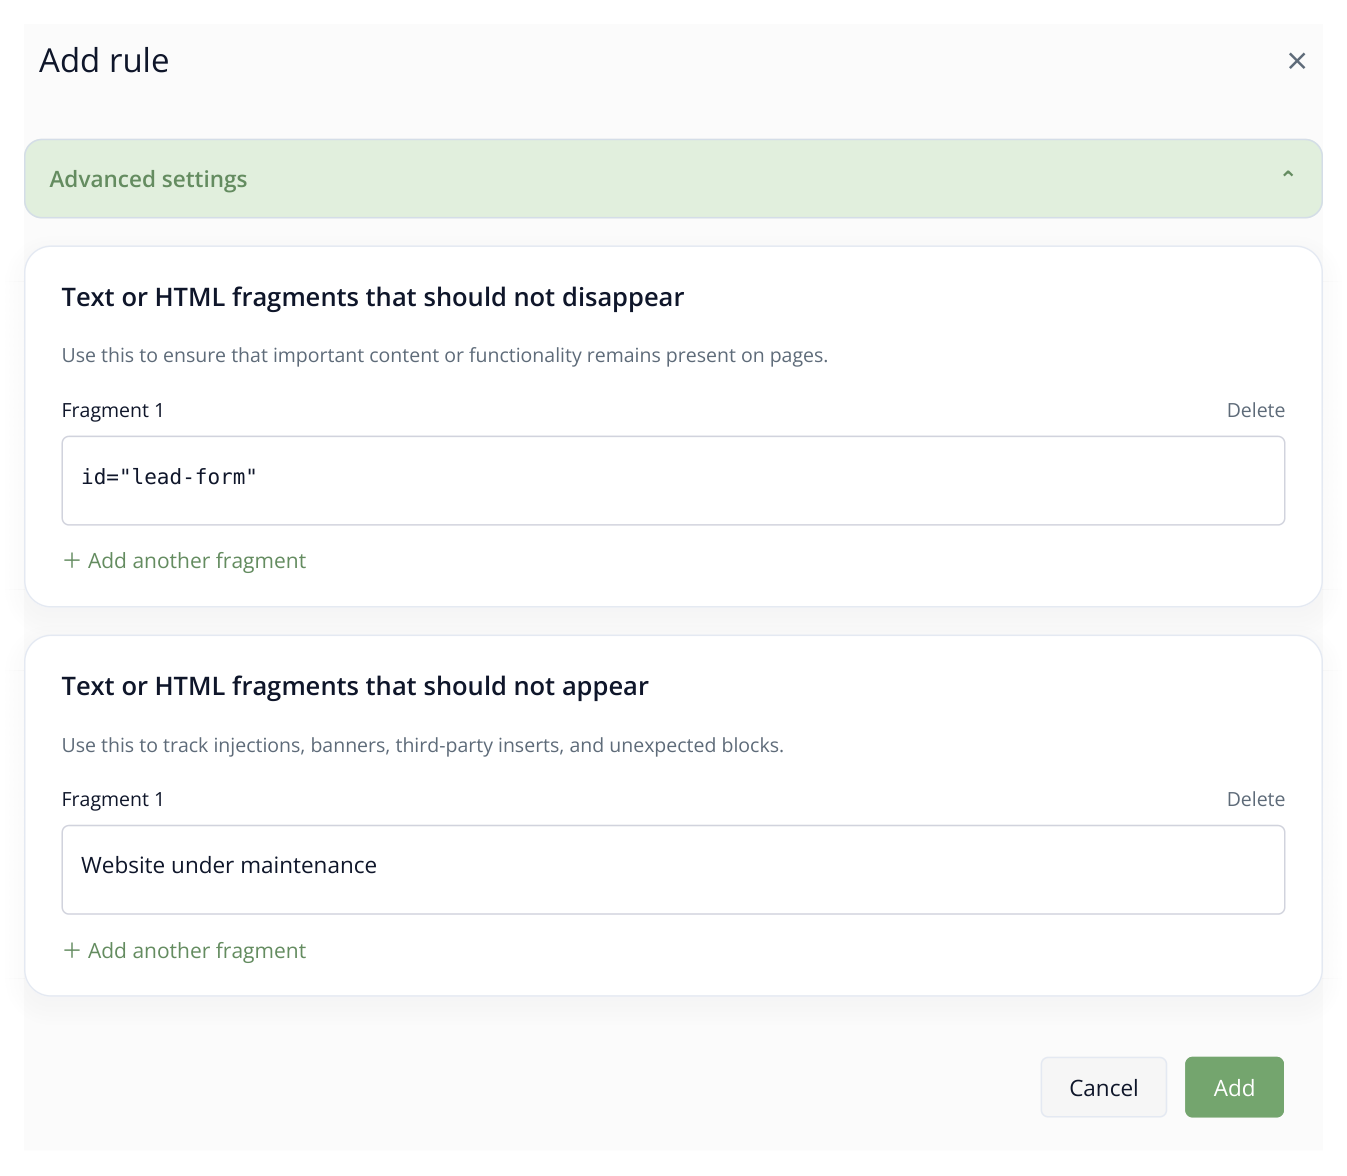
8. Two independent email triggers: id="lead-form" disappears, or “Website under maintenance” appears. Use fragments that match your website's actual HTML.
To track the text of a specific element, use the tracking fields under “Additional content checks”. They accept a CSS selector or regular expression: h1, for example, tracks the page heading. Enable “Notify when tracked fields change” to receive emails when the selected elements change.
Apply the rule to pages and start monitoring
- Save the new rule with “Add”.
- Under “Tracked pages”, click “Add”. On the “add by list” tab, enter the URLs, one per line.
- Select the added pages and click “Set rules”. Choose your rule and confirm the assignment.
- Click “Start analysis”, review the cost and confirm. Wait for the result under “Change report”. This first run saves the initial state of the pages.
Now open “Schedule settings”, choose “Daily at selected hours”, select suitable hours and save. For example, check at 09:00 before work starts and at 18:00 after the day's updates. Subsequent runs compare the pages with the saved state.
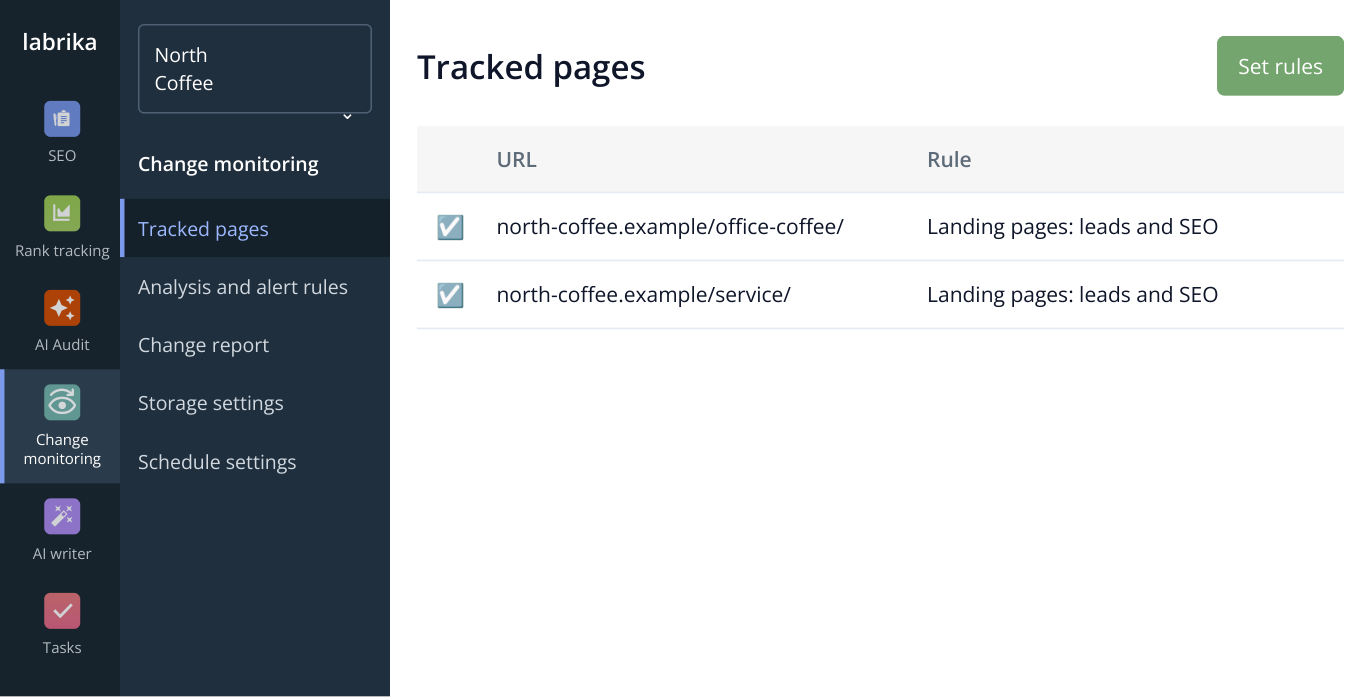
9. Select the relevant URLs and click “Set rules”. The saved rule applies to those pages from the next analysis. This interface excerpt uses sample data.
Create suitable rules for different page types. Monitor forms and meta tags on a service page, while using a content-change threshold for a frequently updated category. Only apply a rule requiring a form fragment to pages that should actually contain that form.
Act on emails for your selected events
The recipient is set in the “Landing pages: leads and SEO” rule. Labrika's email identifies the page and the triggers, such as changed meta tags or a missing required HTML fragment. For an advertising campaign, schedule several checks during the day while keeping the full website audit weekly.
When an email arrives, open the URL under “Change report” and compare the versions before and after the event. If the form disappeared, send the page and saved HTML to the developer. Run another analysis after the fix to confirm the required element is present again. Monitoring helps detect a specific failure between full website audits.
Read more similar articles