
 English
expand_more
 Español
 Deutsch
 Français
 Português
 Türkçe
 Polski
 العربية
 हिन्दी

How to compare SEO audits before and after an agency’s work
Labrika helps you review an agency's or contractor's work against concrete results: which issues were fixed, what changed on the pages and how the published website looks on desktop and mobile. If the contract includes brand mentions and reputation management, add SERM reports covering discovered articles, reviews and publishing platforms. For each type of work, save a baseline and check the result after implementation.
Capture the website before work begins
Before a phase of work starts, run an audit using “Start report”. Its date becomes your baseline. Run another check after the fixes are published so the comparison reflects that phase. If both audits already exist in the history, go straight to selecting the dates.
For content, design and landing page work, enable change monitoring with screenshots beforehand. This preserves both the audit figures and the page versions themselves. For a monthly contract, run the initial check before handing the website over to the contractor, then monitor the pages on a schedule.
For example, an agency has three assignments: fix catalog errors, update service pages and increase the brand's presence on relevant third-party websites. Audit comparisons verify the first assignment, page history and screenshots verify the second, and SERM supports the third. Each part of the brief has its own evidence.
Compare audits and find remaining issues
- In the website project, open “Comparison Reports”.
- For “Date1”, select the audit before the work; for “Date2”, select the audit after completion.
- Enable “Show Only Differences” to quickly find changed metrics under “SEO Audit” and “Technical audit”.
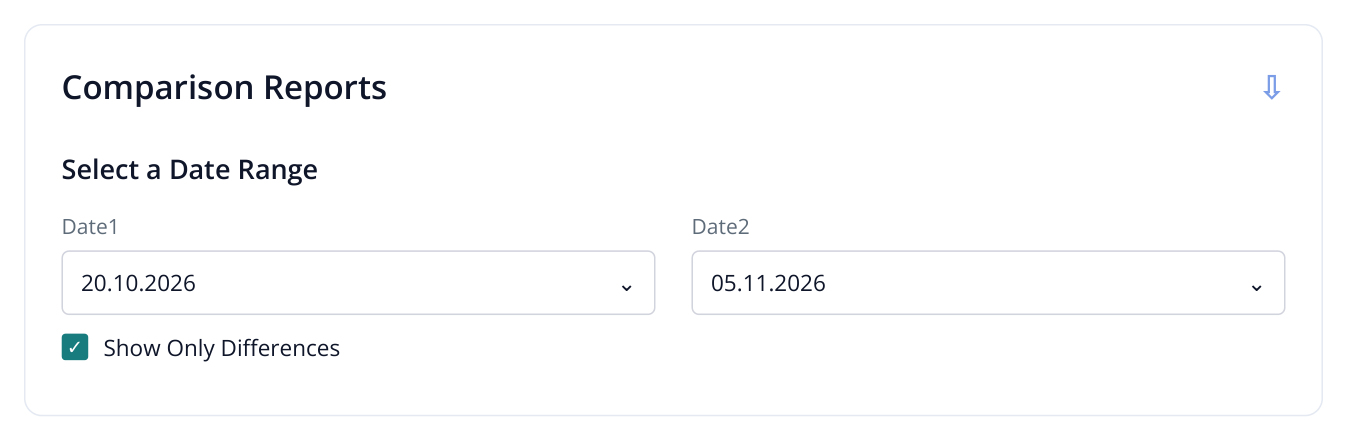
1. Date1 is before work began; Date2 is after the fixes were published. “Show Only Differences” helps you quickly find changed metrics.
Focus on the metrics related to the brief. For meta tag work, compare title and description issues. For navigation fixes, check broken links and unavailable pages. For indexing work, review the relevant canonical, robots.txt and indexing restriction checks.
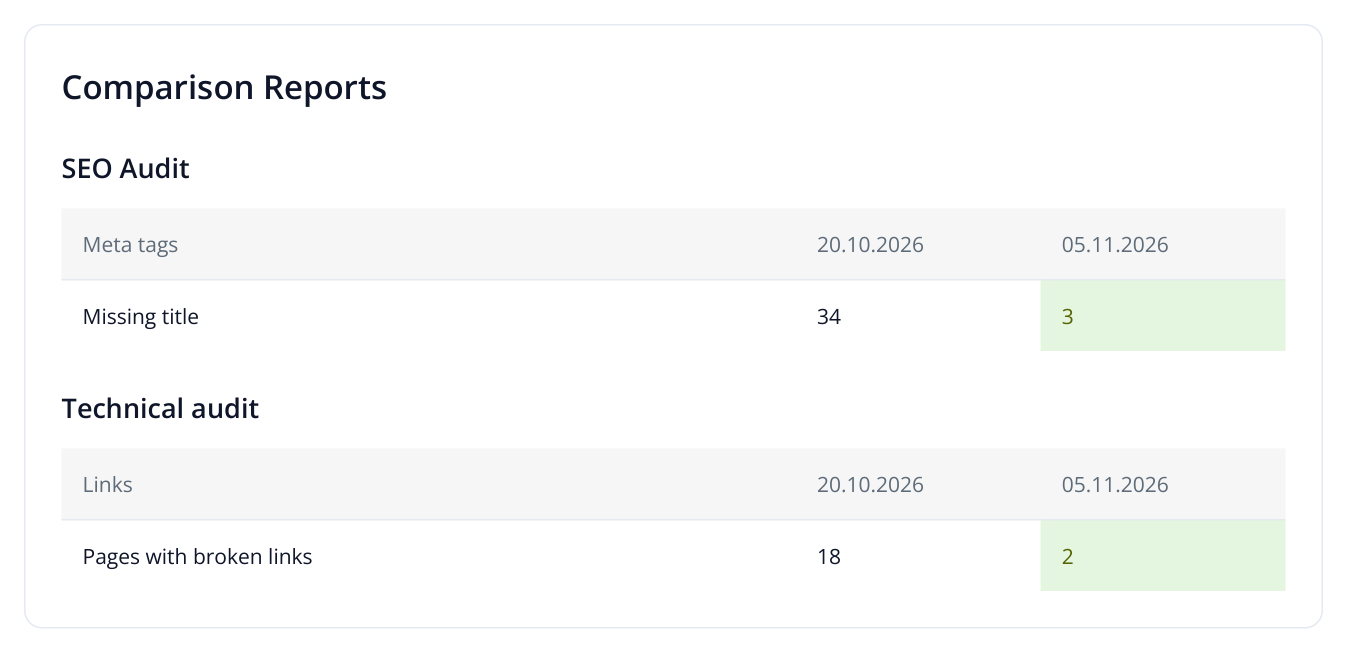
2. A sample comparison with the same scope of 240 pages: 31 fewer missing titles and 16 fewer pages with broken links. Remaining issues appear in the right-hand column.
In this example, the contractor filled in 31 of 34 missing titles and fixed broken links on 16 of 18 pages. Open the detailed reports from the audit menu and collect the remaining URLs: three pages still need titles and two still need link fixes. These become specific review comments.
Then disable “Show Only Differences” to see promised fixes where the error count did not change. Check that both audits cover the same domain, crawl folders and number of pages. If 240 URLs have become 80, first determine why the others were not crawled. Pages disappearing from the audit do not count as resolved issues.
Set up change monitoring and screenshots
Monitoring is especially useful when an SEO specialist, developer and editor work on the website at the same time. It saves published page versions, showing replaced text, meta tags, HTML and the appearance after changes go live.
- Create a “Monitoring” project, choose “Simple mode” and add the URLs from the brief. For an existing project, use “Tracked pages” → “Add”.
- Open the rule under “Analysis and alert rules”. In “Page screenshots”, enable “Take desktop screenshot” and “Take mobile screenshot”.
- If elements load with a delay, set “Delay before screenshot, sec.”, for example, to 5. Enable “Parse JS” to analyze text rendered by JavaScript.
- Set the HTML, content and meta tag change thresholds. To track even small text or title edits, use 0 to react to any change.
- Save the rule and apply it to the required URLs through “Set rules”. In “Storage settings”, choose an HTML and screenshot retention period that covers the work and its review.
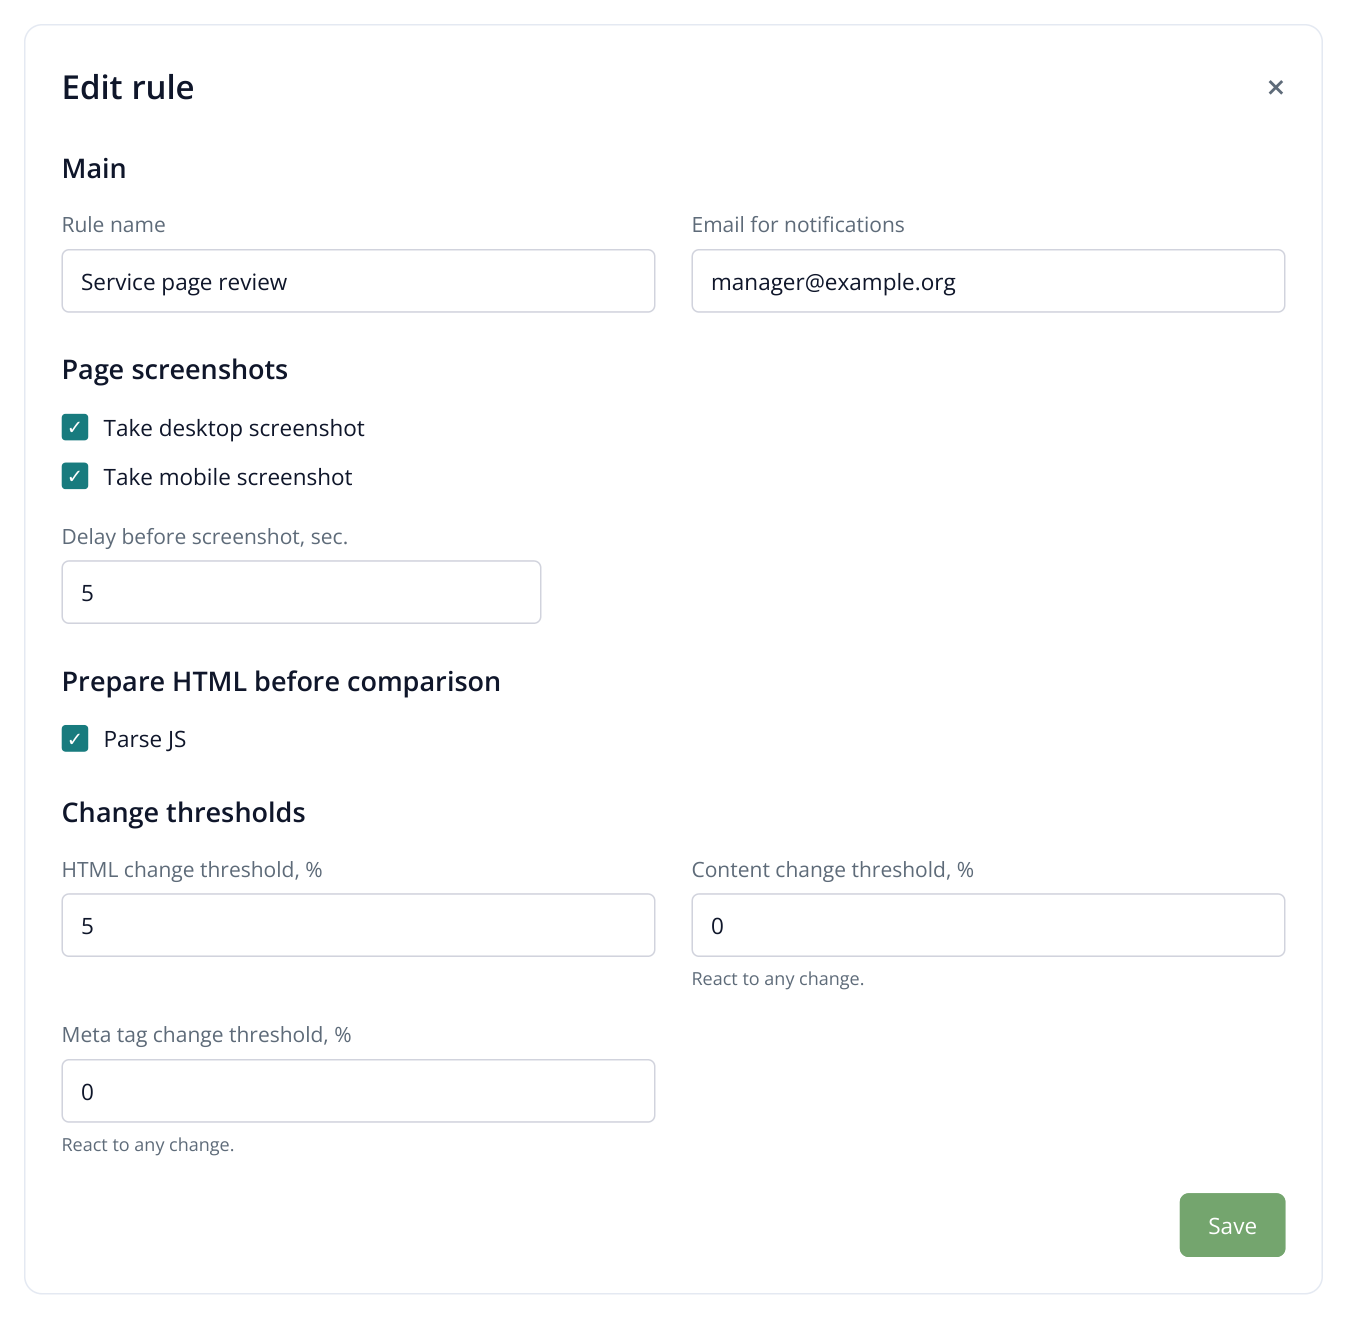
3. A rule excerpt: both screenshot types are saved, and even small text or meta tag edits are detected. The settings and email address are examples.
Click “Start analysis”, review the cost and confirm. Wait for the first result before changes begin: it saves the baseline versions. Then use “Schedule settings” to schedule daily checks at suitable hours. Enter the notification recipient in the rule's “Email for notifications” field.
For a redesign, track the homepage and one URL for each modified template: a category, product page and service page. If the contractor is editing specific landing pages, include every URL in the brief. This covers both shared layouts and individual assignments.
Check the scope of work and specific edits
Open “Change summary” in the monitoring project. It shows how many tracked pages and words were added, removed or changed between the selected run and the previous completed run. Categories below the summary open the relevant URL lists.
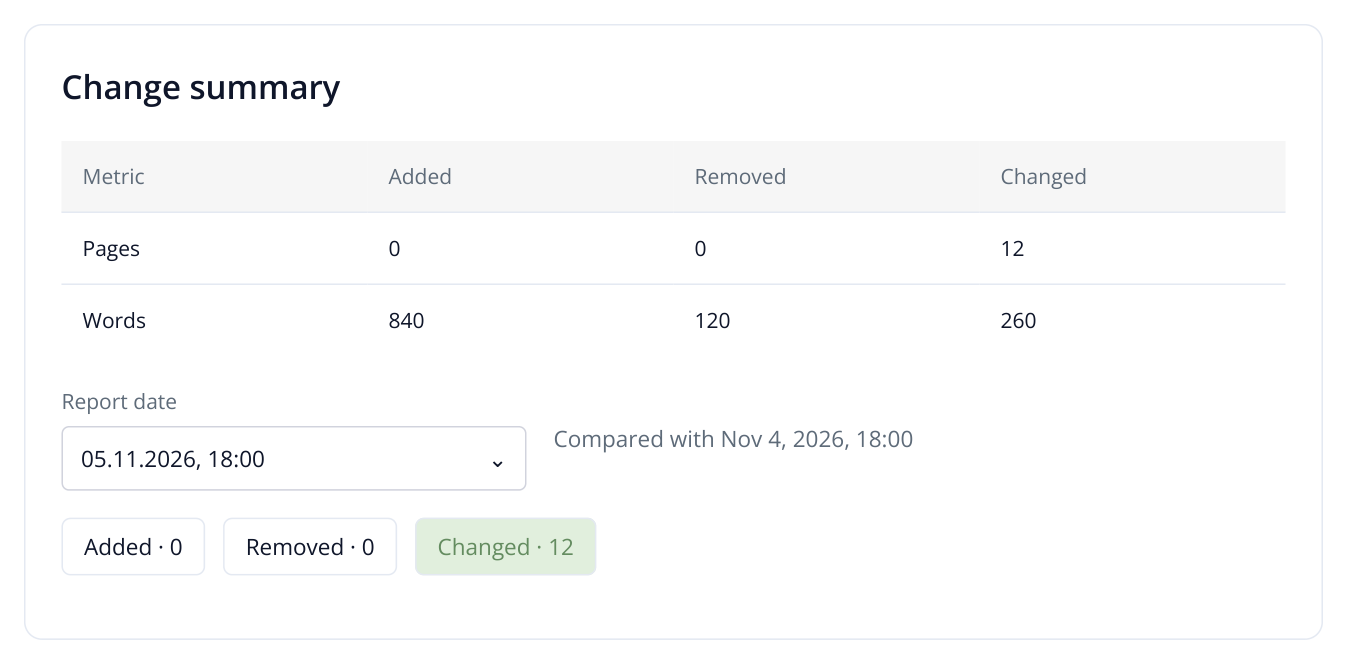
4. A summary excerpt comparing consecutive runs: 12 tracked pages changed. “Changed” opens their list below. Word counts help you assess the extent of the edits.
Suppose the contractor reports updating 12 service pages. Find those URLs in the summary and use “Open” to inspect them. Word counts indicate the volume of editing; text comparison shows what was done, such as adding service terms, rewriting a heading or changing only a short label.
If work spans several weeks, open a URL in “Change report”, choose the end date and use the blue second-date button in the right panel. Select a saved run from before the work began. Then click the “% content changed” value. You can compare any two available dates for that page, even when other checks occurred between them.
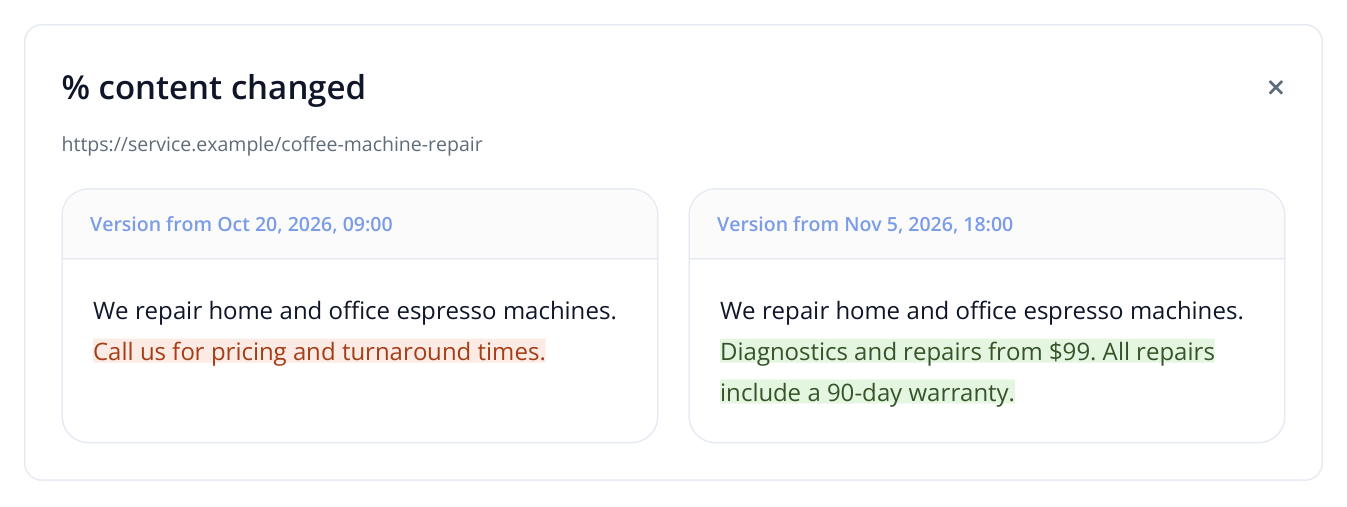
5. The two versions show specific service terms: removed text is red and added text is green. The example uses the same observation dates.
The summary records website changes, so match URLs to the contractor's assignments: your own staff may have updated content on the same days. A page can appear in several daily summaries during a month. To review a 12-page assignment, check those exact 12 URLs.
Review the design using screenshots
In the page panel, click “% desktop screenshot changed” or “% mobile screenshot changed”. “Side by side” displays two dated versions next to each other. “Before / After” lets you move a divider across the screenshots to compare element placement.
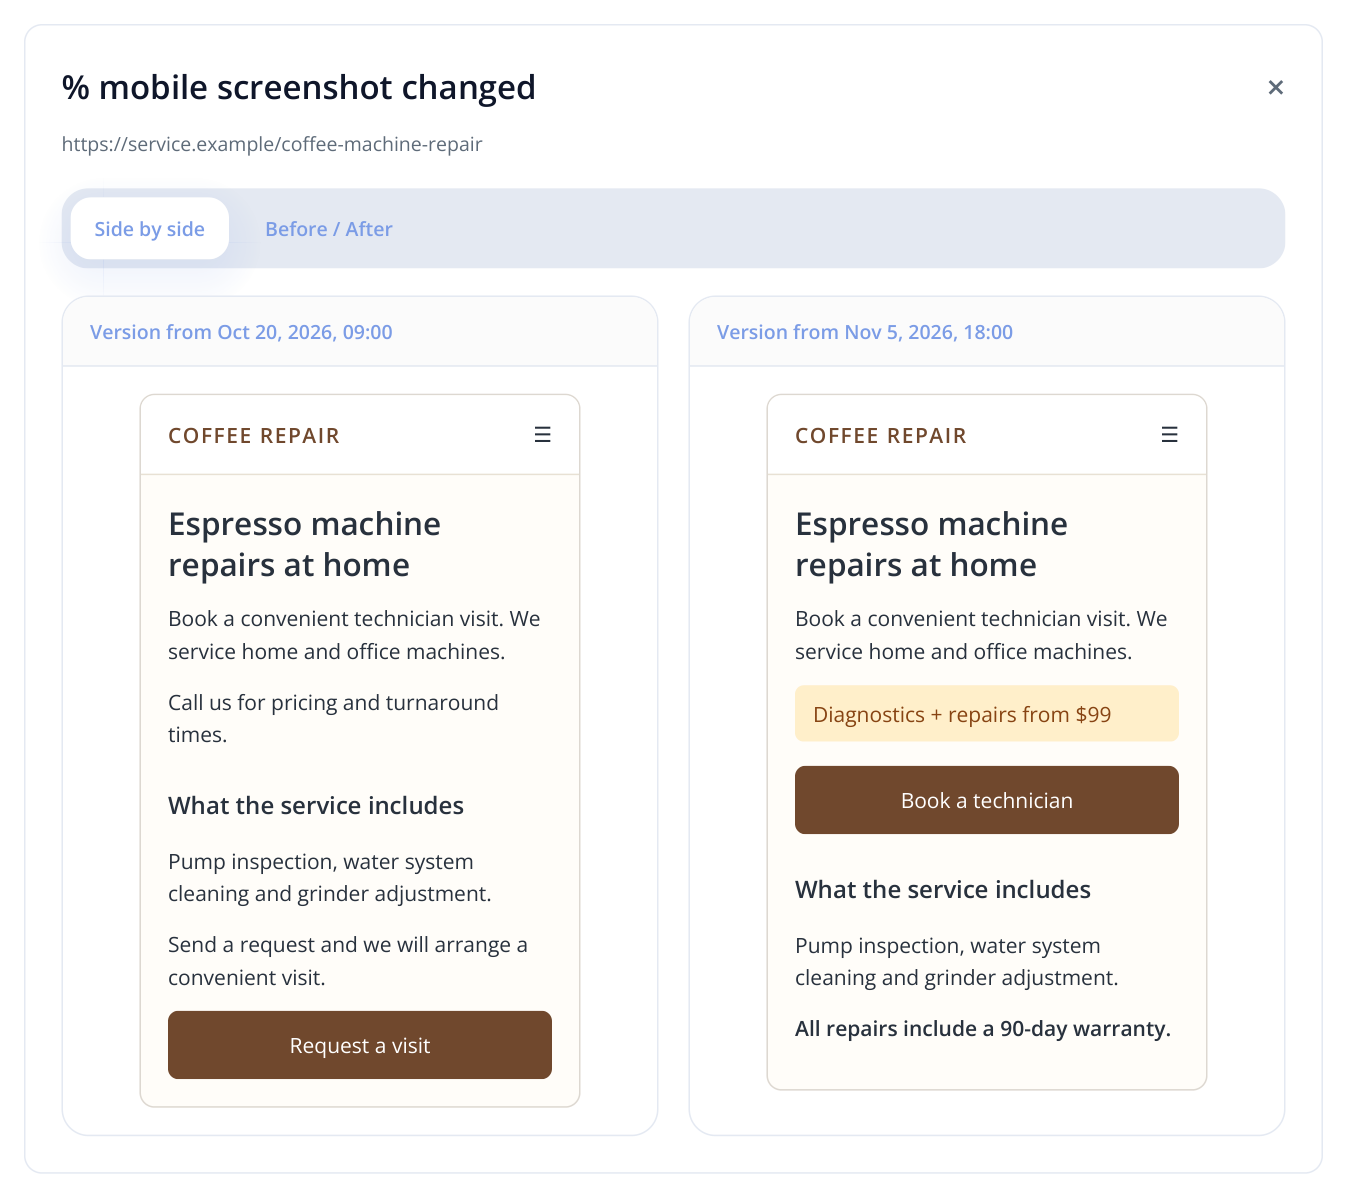
6. Reviewing a mobile page: the contractor moved the price and contact button higher and added warranty information. The screenshots show the published versions on two dates.
For a store owner: check whether delivery terms, a warranty and the new buy button appear on product pages. For an agency manager: show the client the published page after design and development work. For mobile fixes: compare section sizes, text wrapping and button placement on the narrow screen.
Click the title, description or H1 change percentage to verify those edits. To inspect markup, open “% HTML changed”; retrieve a saved version with “Download HTML”. Test form submissions and payments separately on the website: screenshots record how the page looks.
Add SERM when brand mentions are part of the contract
If the contractor handles reputation management, placements, reviews or your presence on third-party websites, include SERM findings in the review. An audit of your own website cannot show which new materials about your brand appeared elsewhere.
- In SERM, configure the brand, name variants, domain and analysis sources. Run a baseline check before work begins, then repeat the analysis after the agreed phase using the same settings.
- Open “Summary”. Review the number of discovered items, the change from the previous analysis, the proportion of negative coverage and average sentiment.
- Click the item count to open the feed. In “Mention history”, choose the required “Analysis date” and match the discovered texts and links against the contractor's placement list.
- Under “Platforms”, inspect the websites hosting material about the company. If the brief includes negative coverage, review those items and the actions taken.
For example, the baseline found 46 items about the brand and the later run found 63, an increase of 17. The contractor claims 10 placements: find those exact ten links in the feed. Other coverage may have appeared independently. Both the overall trend and verification of the agreed placements are useful in your report.
| Contractor's assignment | What to inspect in SERM | Evidence for the review |
|---|---|---|
| Placements mentioning the brand | Item count and specific feed entries | Discovered URLs from the agreed list |
| Presence on relevant industry websites | Platform list and materials about the company | Which planned platforms now feature the brand |
| Review management and negative coverage | Sentiment, reasons for complaints and action statuses | Which issues have been addressed and which still need a response |
Keep the same sources and brand name variants for comparable measurements. If you add sources, note this alongside the figures: some growth will reflect expanded monitoring. SERM's item count refers to the data it collected, while the links let you verify individual placements.
If SERM is not configured yet, create a brand project in SERM, enter its name variants and required sources, and run the initial collection before placements begin. Repeat it with the same settings after the work. In “Platforms”, open the source you need and compare its URLs with the contractor's report. Matching publications substantiate that part of the assignment. See the GEO audit and SERM guide for a detailed platform selection example.
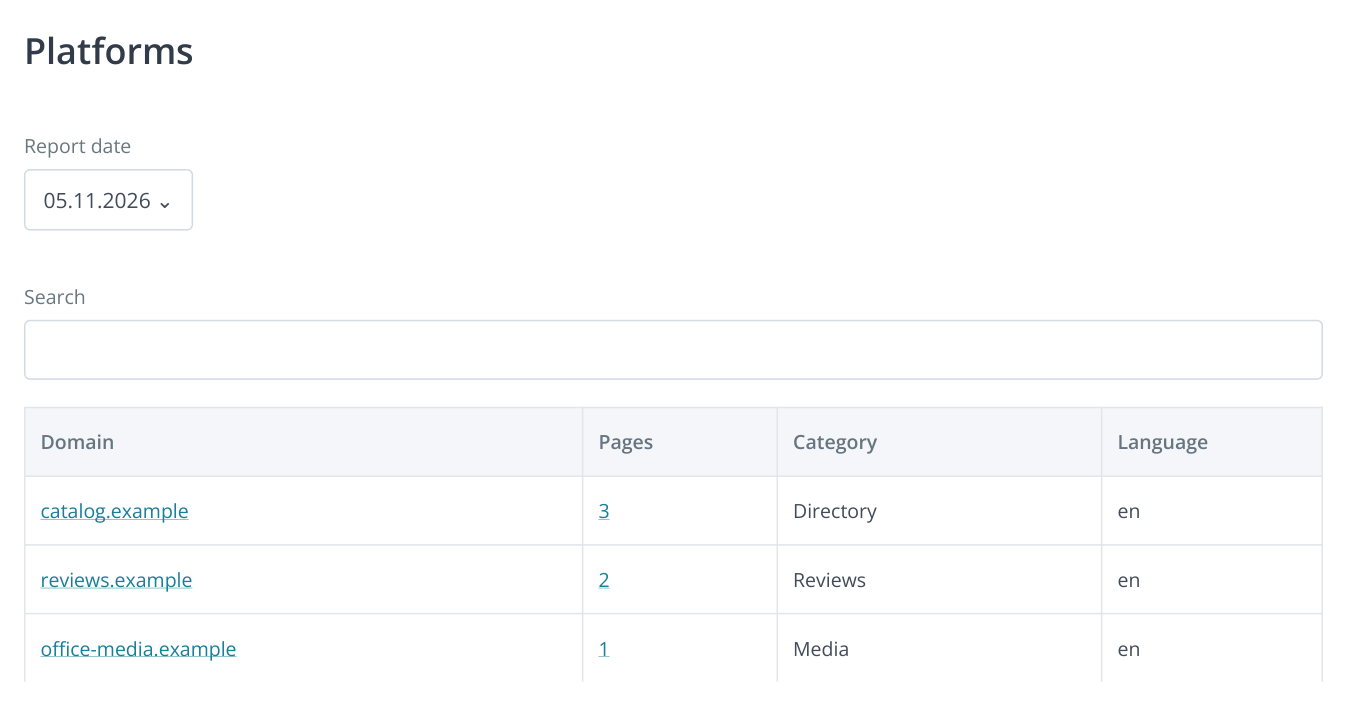
7. A “Platforms” excerpt without the menu: each domain groups discovered pages; its “Pages” count opens their list. The sample data illustrates verification of contractor placements.
Prepare evidence for the client or contractor
In “Comparison Reports”, click the “Download report” icon. In the “Export rankings” dialog, select the required “Date1” and “Date2” again: the export has its own date selection. Click “Download” to download the comparison as XLSX.
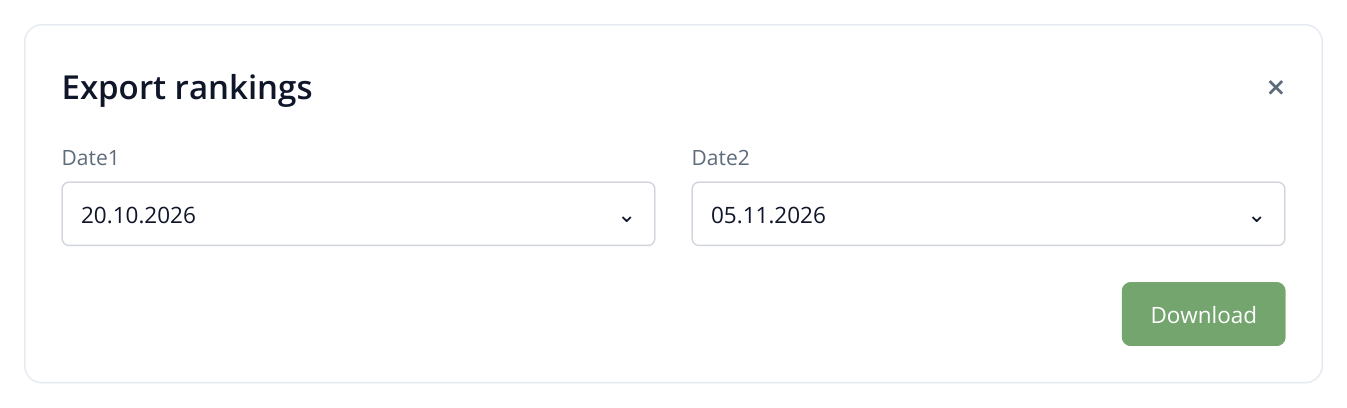
8. Select the review dates again in the export dialog. Send the resulting XLSX to the client with the list of remaining URLs.
Add monitoring and SERM results if they are included in the contract. For clients with project access, share report links and comparison dates. For clients without access, provide exports and saved evidence. The SERM summary is available in PDF and DOCX. Tie your explanation to the brief: “31 titles completed, 3 remaining; terms updated on 12 service pages; all 10 agreed placements found.”
If the contract includes ranking or traffic growth, attach the trend for the agreed period. For rankings, keep the same keyword group, location and device. The agency can show both completed work and changes in performance, while the client receives a precise list of accepted tasks and remaining fixes.
Read more similar articles