
 English
expand_more
 Español
 Deutsch
 Français
 Português
 Türkçe
 Polski
 العربية
 हिन्दी

How to track product prices and receive alerts in Labrika
Labrika checks prices on a schedule, saves the values it finds and emails you when they change. Shoppers can wait for a discount, purchasing teams can spot increases before ordering, and stores can compare competitors' offers. We will set up two product pages from one store, from selecting the right price to recurring checks and exports.
Create a project and choose price monitoring
Open “Add new site” → “Monitoring”. Enter a name, such as “Coffee machines — Example store prices”. Click “Create project” at the bottom right. You will add product URLs after configuring the rule.
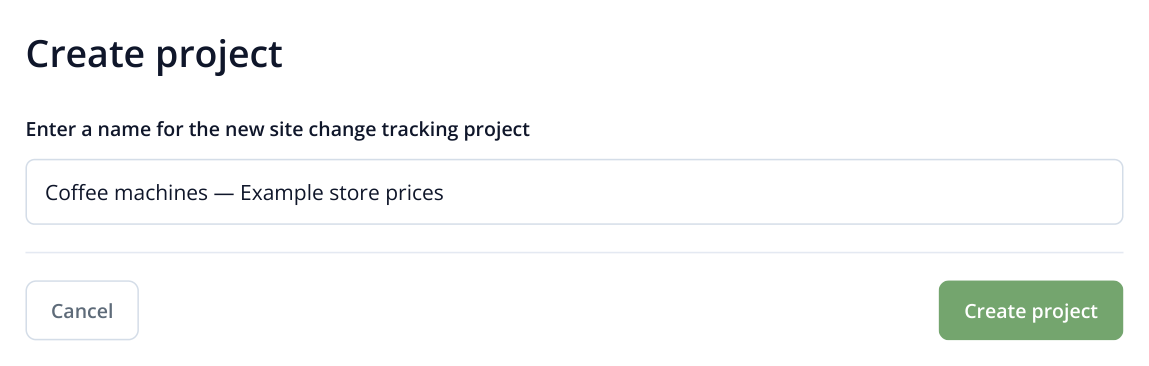
1. Enter the project name. “Create project” is at the bottom right; rule settings and URL entry follow on the next screens.
On the next screen, select the “Price monitoring” card. A border and checkmark highlight it. Click “Create” below the cards on the left; the “Create rule: Competitor prices” form opens on the right.
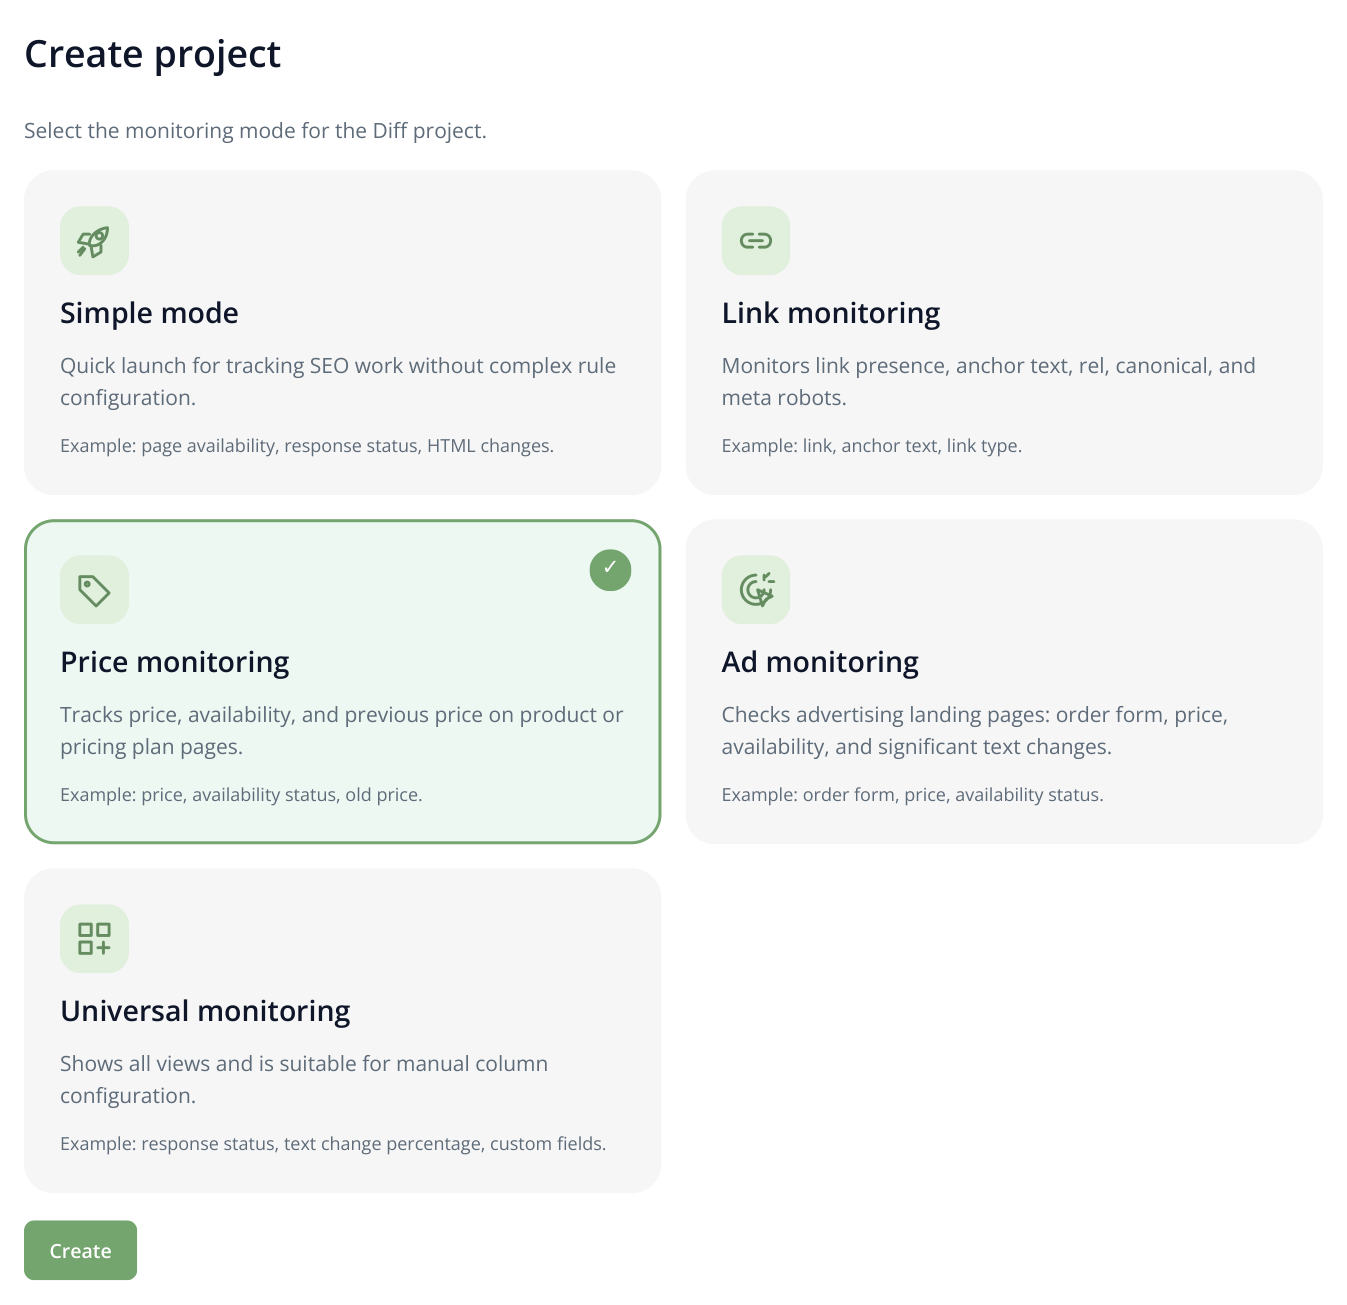
2. “Price monitoring” is selected. The button below the cards opens the rule wizard with product fields.
Choose a page whose price you can verify easily. In this example, the Model A coffee machine costs $399.90, with an old price of $449.90 crossed out beside it. We want to track the purchase price. The “Competitor prices” form also works for personal shopping: add pages from the store you want to watch.
Find “Price” and open the selector helper
At the top of the form, fill in “Rule name” and “Email for notifications”. Name this example rule “Coffee machines — Example”. One rule can apply to several product pages with the same structure.
Below are “Product name”, “SKU”, “Group”, “Price”, “Availability”, “Rating”, “Discount / Old price” and “Backup field”. The price field defines how to find the value on the page. Click the magic wand at the right inside “Price” to open “Selector and regex sandbox”.
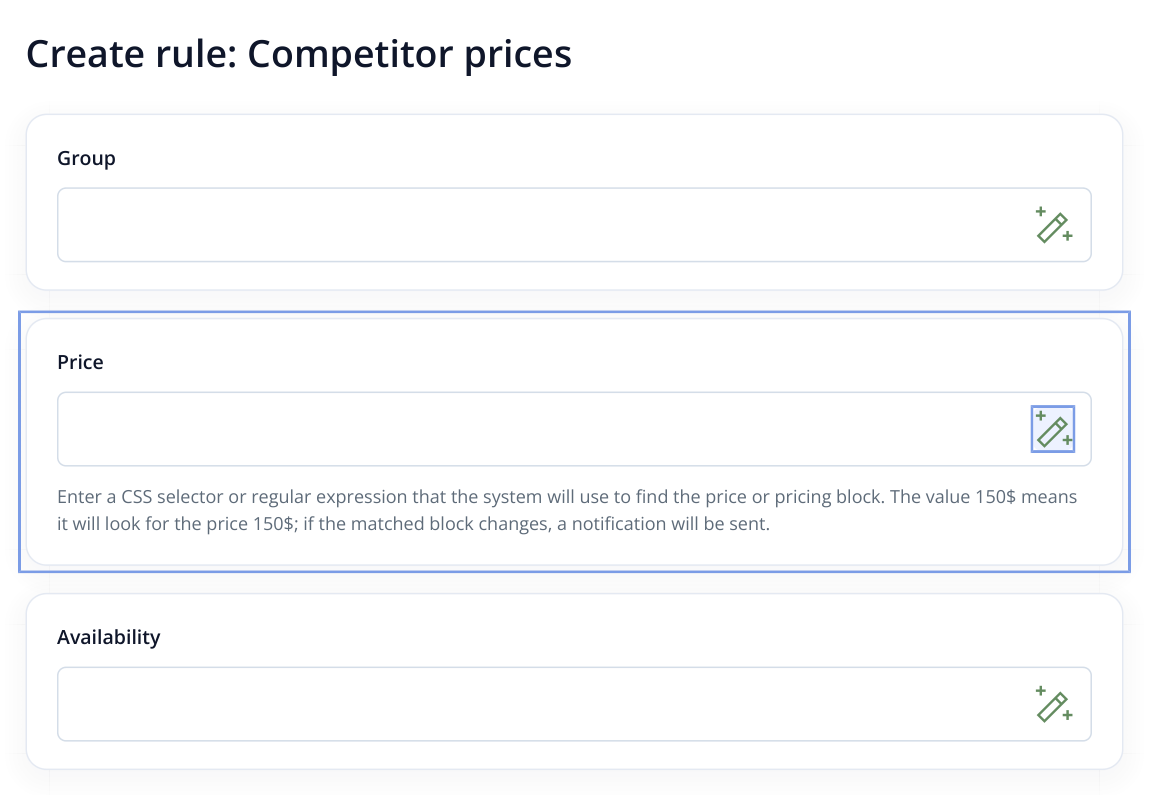
3. Part of the form: “Price” sits between “Group” and “Availability”. Open the wand in the price row so the selected expression returns to that field.
For the first run, configuring the price is enough. A CSS selector identifies a page element; a regular expression finds a value matching a pattern. The sandbox suggests options from visible text, so you do not need to write an expression from scratch.
Load a product page
Paste the full product URL into the sandbox's top field, such as https://shop.example/coffee/model-a/. If the store displays prices only after scripts run, enable “Render JavaScript”. Click “Load”.
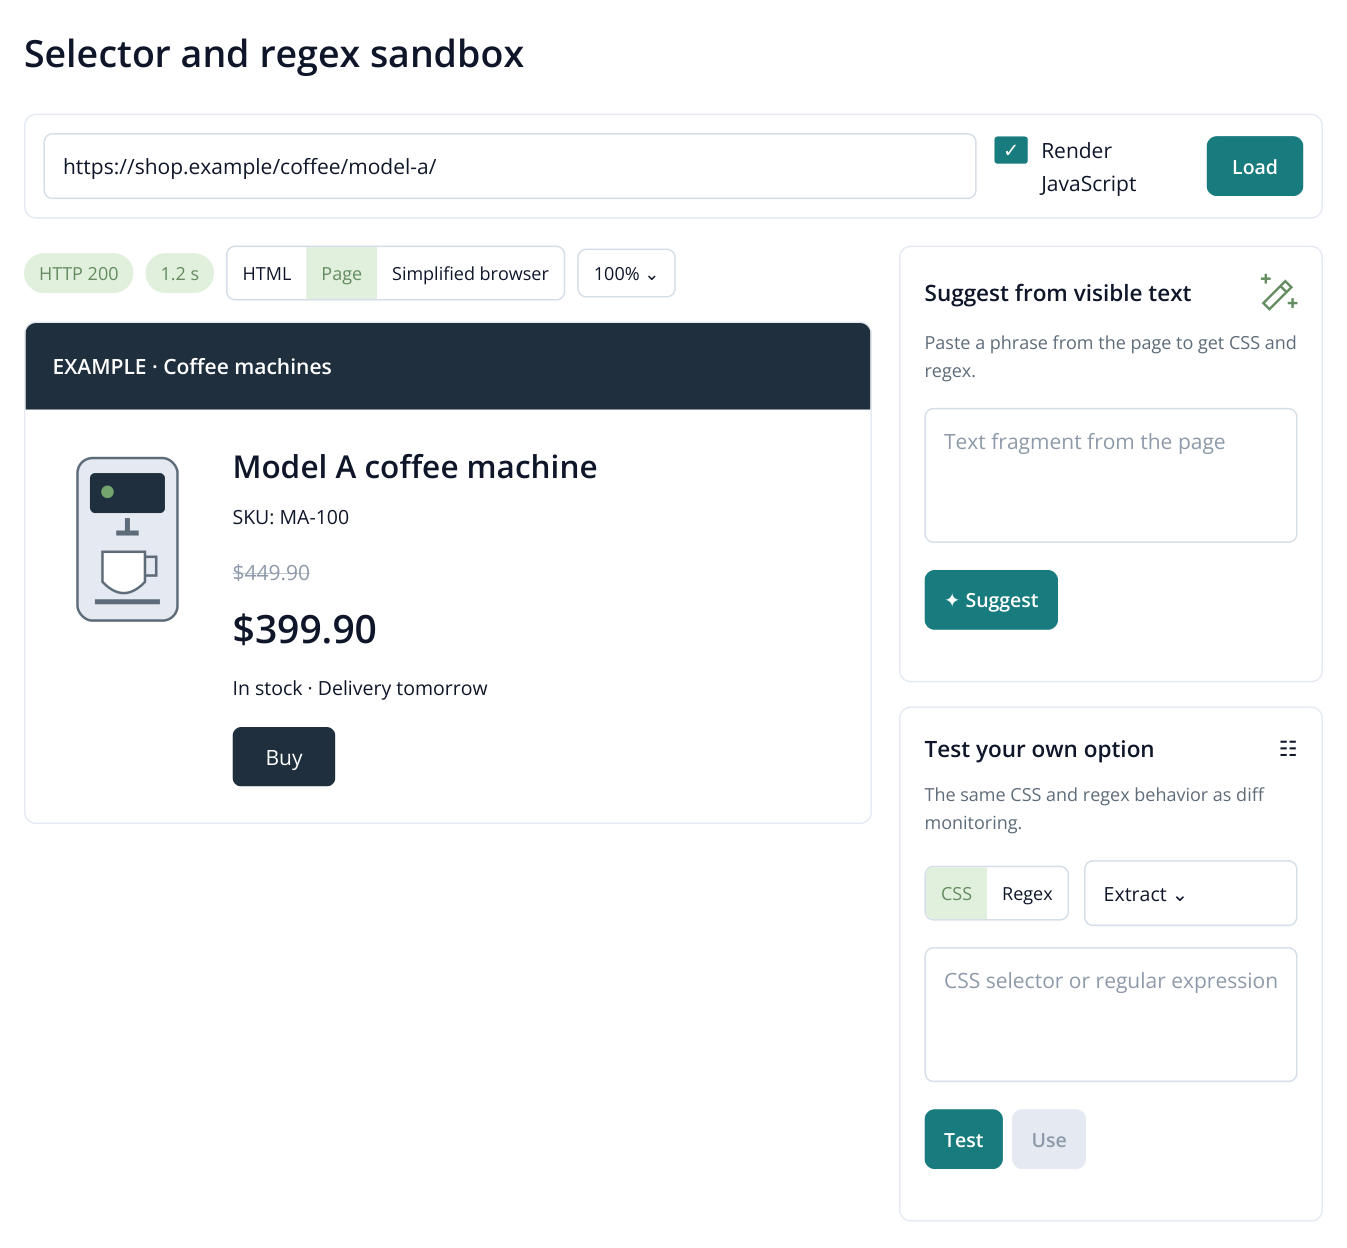
4. The product page is loaded with JavaScript. The example store appears on the left; text suggestions and manual testing are on the right. $399.90 is the current price and $449.90 the old price.
The loaded page appears on the left. Above it are the response code, loading time, “HTML”, “Page” and “Simplified browser” tabs, and zoom. Open “Page” and locate the price. If it is missing, enable JavaScript and reload the URL.
Check that you have the right model and configuration. A product page may contain a current price, old price, monthly payment and related products. Here we select $399.90, not the crossed-out $449.90.
Generate an expression from the displayed price
In “Suggest from visible text” on the right, paste $399.90, using exactly the spacing and currency symbol on the loaded page. Click “Suggest”.
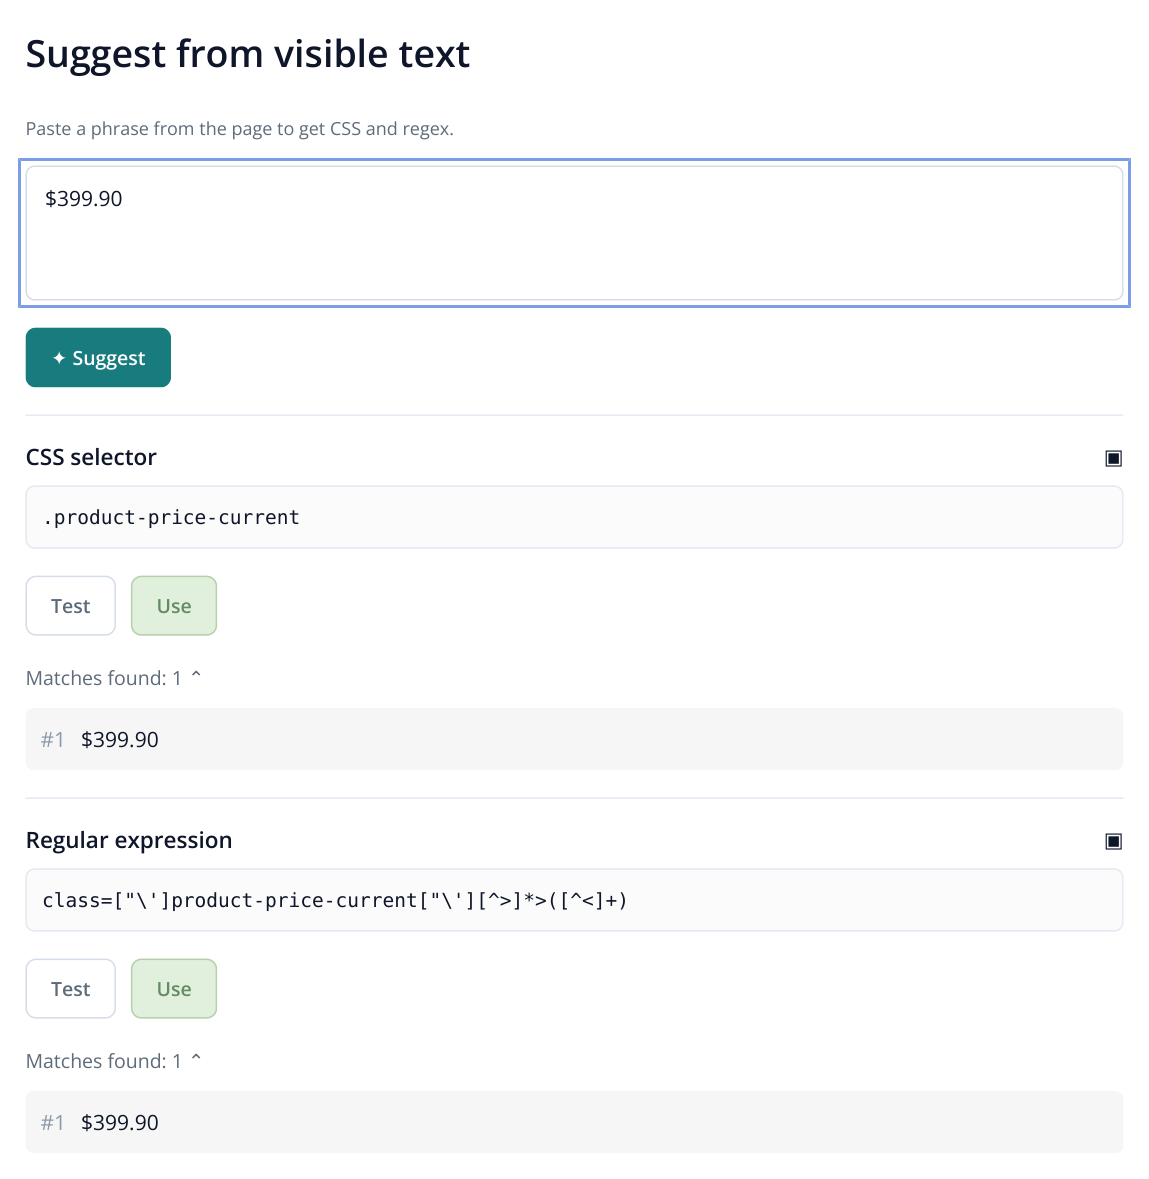
5. The suggestion panel: each expression has its own buttons and expandable match list. Both examples find the current price; click “Test” first.
Options labeled “CSS selector” or “Regular expression” appear. Each has “Test”, “Use” and a match count below it. Click the count to expand the values found. This helps spot an expression that also captures a price from a recommendations block.
Start with an option returning the correct current price and click its “Test” button. If there are no suggestions, compare your entered text with the loaded page; the HTML tab helps check whether the price is present.
In this example, .product-price-current works. This is a fictional store class; use the suggestion generated for your website. For multiple products, a shared price-block class is more convenient than an identifier containing one product's number.
Check the first match and click “Use”
The CSS or Regex mode and selected expression appear in “Test your own option”. For price collection, the action should be “Extract”. “Test” runs extraction: the matching fragment is highlighted in the HTML tab on the left, and the result and match list appear on the right.
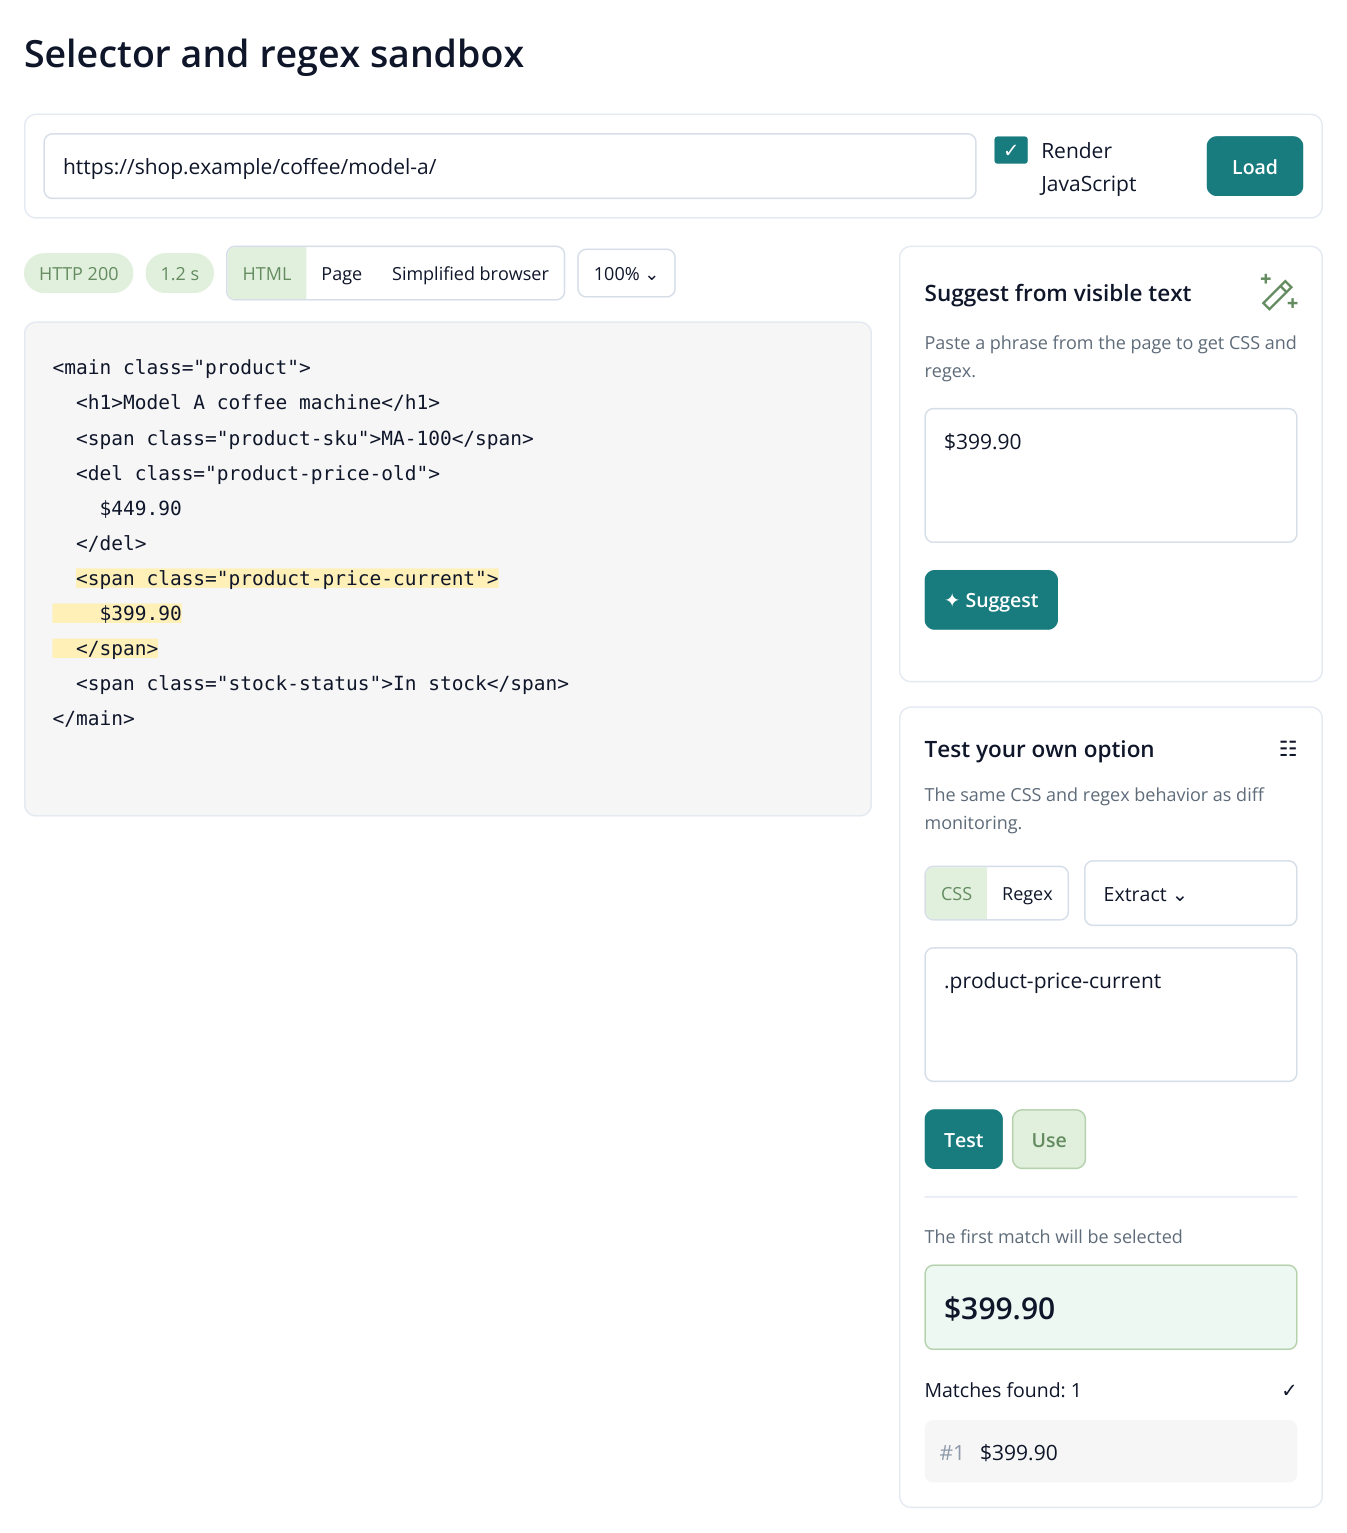
6. Testing the selector: the current-price block is highlighted in HTML and the first match on the right is $399.90. “Use” transfers the expression into the rule. Store HTML and results are illustrative.
Review the value under “The first match will be selected”. This is what will populate the price field: $399.90 in our example. If another number comes first, return to the suggestions and test a more precise option.
Once the value is correct, click “Use”. The sandbox closes and transfers the expression and extraction mode to the “Price” field you opened it from. Clicking “Test” alone does not fill the rule.
For the second product from the same store, reopen the wand in “Price”, replace the URL with Model B and load it. Test the same expression: it should return $429.90 in this example. One rule can then collect each model's own price. Create a separate rule for a store with a different layout.
Configure fields and notifications
Configure other fields in the same way: open the wand, load the product, generate a text-based suggestion, test it and click “Use”. Choose the information your task requires:
| Field | When it helps |
|---|---|
| Product name and SKU | Match the same model across suppliers and distinguish configurations. |
| Availability | Separate an available offer from a low price for an out-of-stock item. |
| Discount / Old price | Save the crossed-out price separately from the purchase price. |
| Group, rating and backup field | Add a category or another useful attribute to your working spreadsheet. |
Leave “Notify when tracked fields change” enabled near the bottom of the rule. Emails are sent when any configured field changes, including price increases. To receive messages only about price changes, configure only that field.
If the test load needed JavaScript, enable “Run JavaScript during checks” here too. The sandbox's “Render JavaScript” switch affects the test load; it does not change regular collection settings.
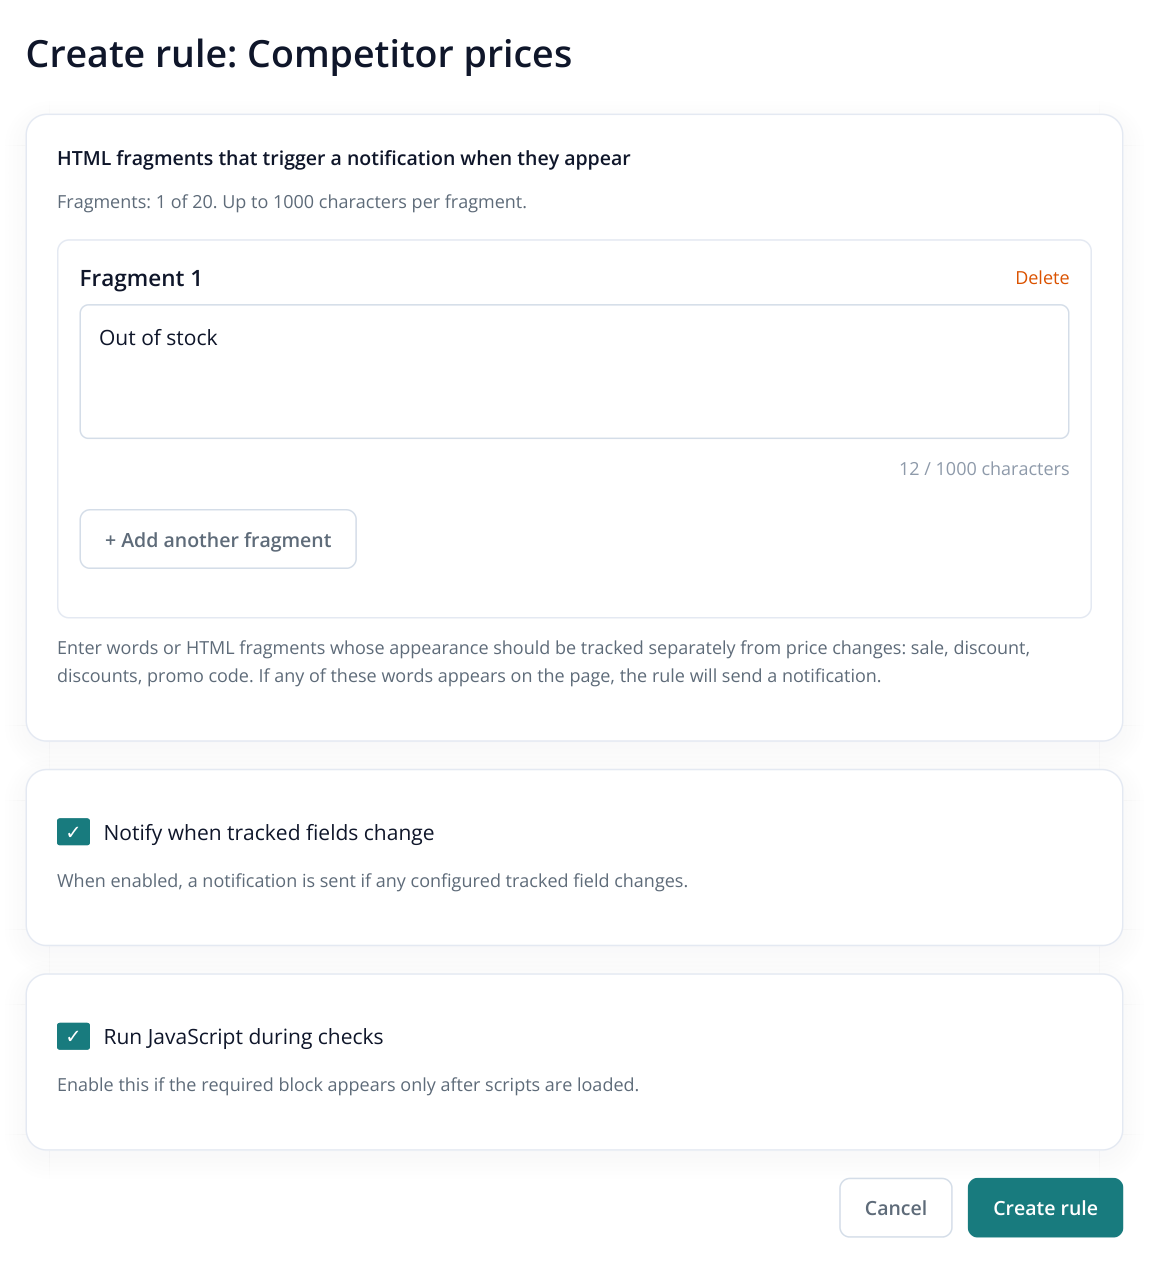
7. The bottom of the form. Field-change notifications and JavaScript are enabled. “Out of stock” is added separately; remove it if you only want price tracking.
Use “HTML fragments that trigger a notification when they appear” for a separate alert about a phrase such as “Out of stock”. For price-only tracking, delete preset phrases you do not need. This example keeps one “Out of stock” fragment to detect when the product becomes unavailable.
Check the email at the top of the form and click “Create rule” at the bottom right.
Add product pages and check the assigned rule
After saving, “Rule created” appears. Under “Now you can:”, select “Paste page URLs of competitors where prices need to be tracked”. This opens URL entry for the rule you just configured.
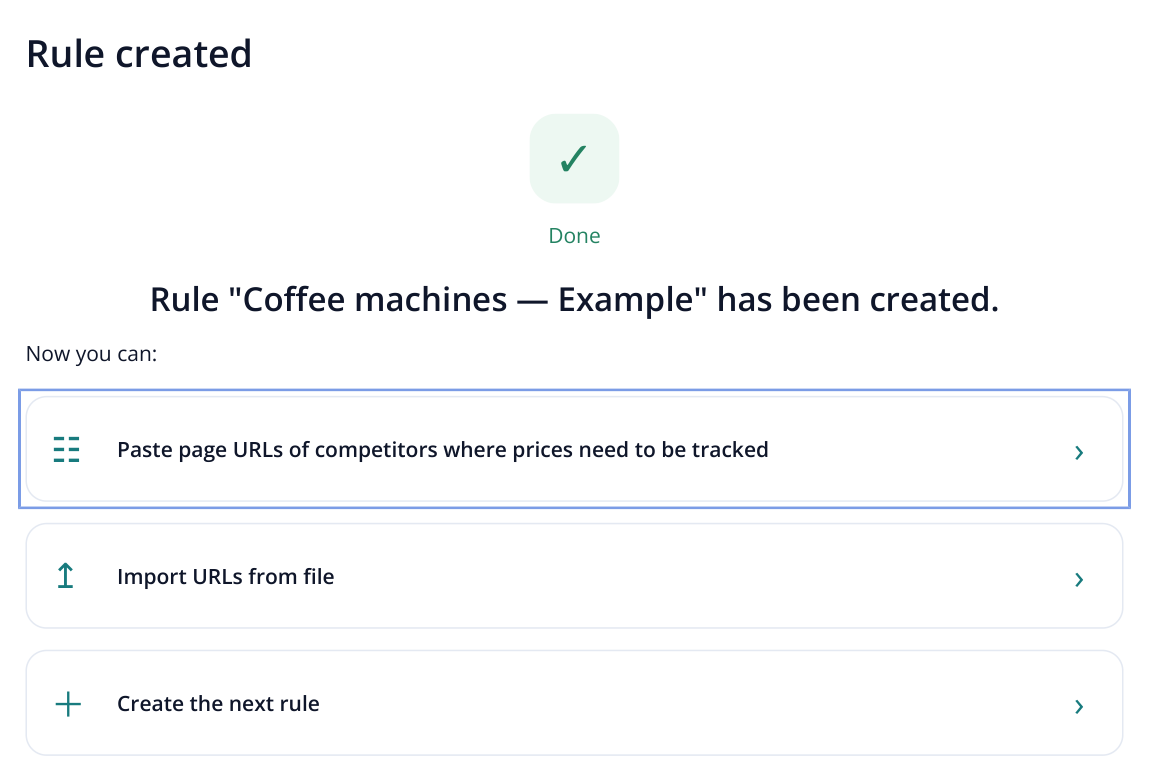
8. Rule creation is complete. The first option opens manual URL entry and keeps the new pages associated with this rule.
In “Import URLs”, paste complete URLs, one per line. We add Model A and Model B from the same store. Click “Add” below the field on the right.
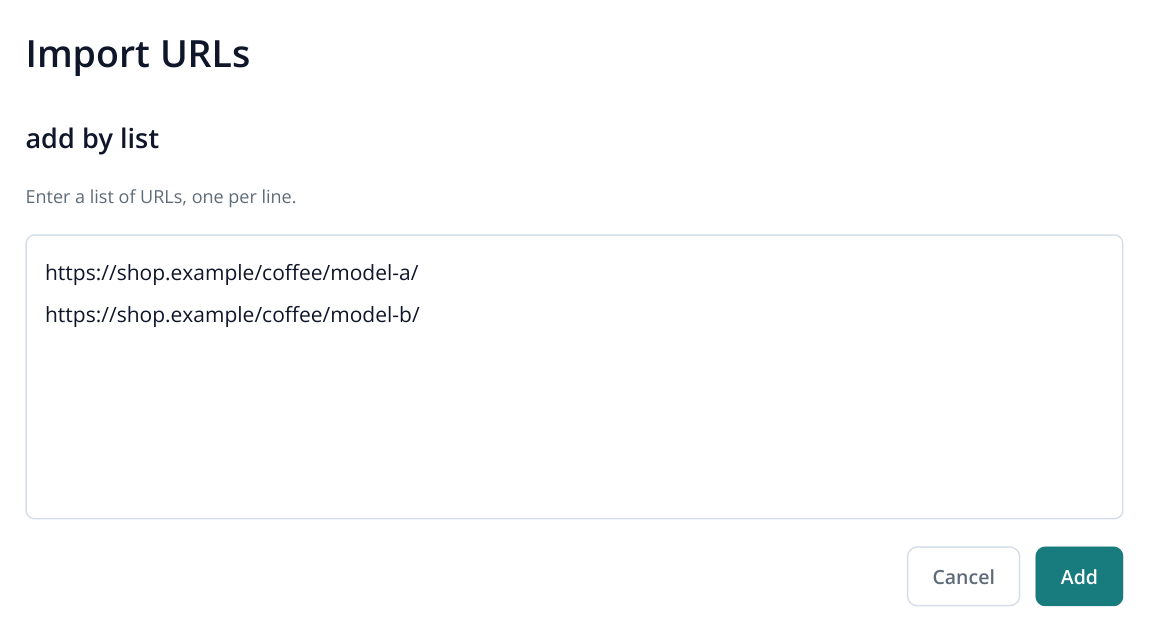
9. Manual entry opens the “Import URLs” panel. You do not need to select the rule again: the wizard has already passed it through.
Review the number of URLs added and click “Continue”. A message confirms the rule assignment; “Go to URL list” opens the added pages. The wizard applies the rule automatically.
For pages already in the project, open “Tracked pages”, select the rows and click “Set rules”. Choose your rule. Before the first run, check its name beside the URLs in the table.
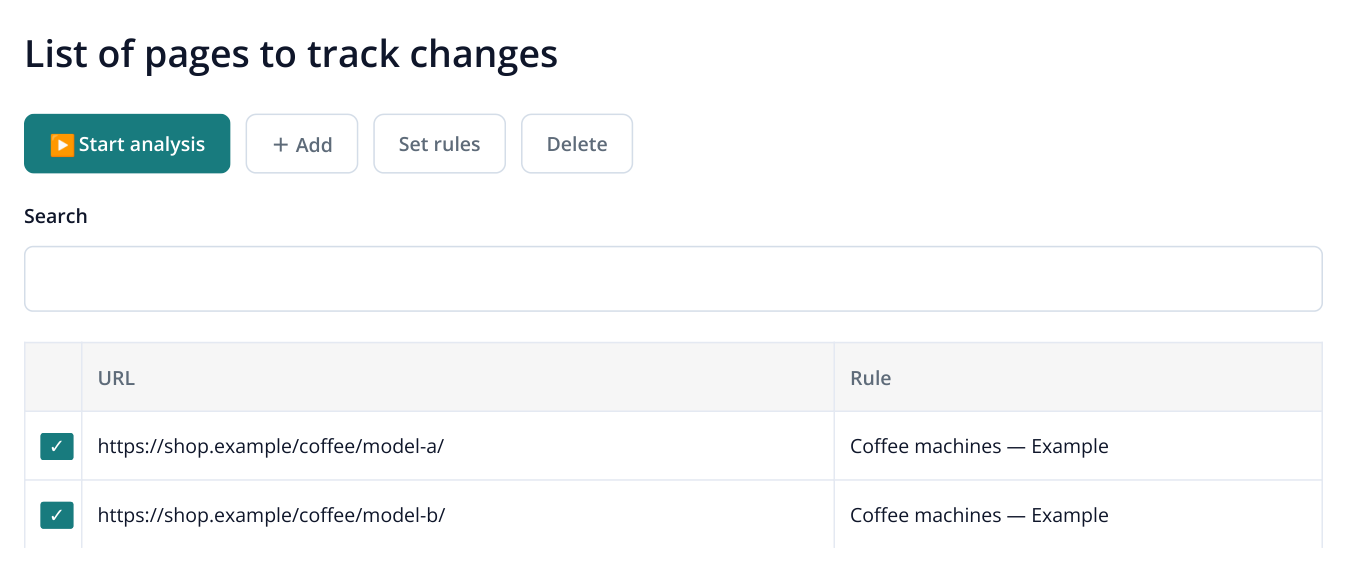
10. Both products have the “Coffee machines — Example” rule. “Set rules” changes the selected rows' assignment; “Start analysis” opens collection confirmation.
Run the first collection and verify prices
On “List of pages to track changes”, click “Start analysis” above the table. In the dialog, choose credits or money and review the calculated run cost and remaining balance. The question-mark icon beside the cost opens its breakdown. Click “Start”.
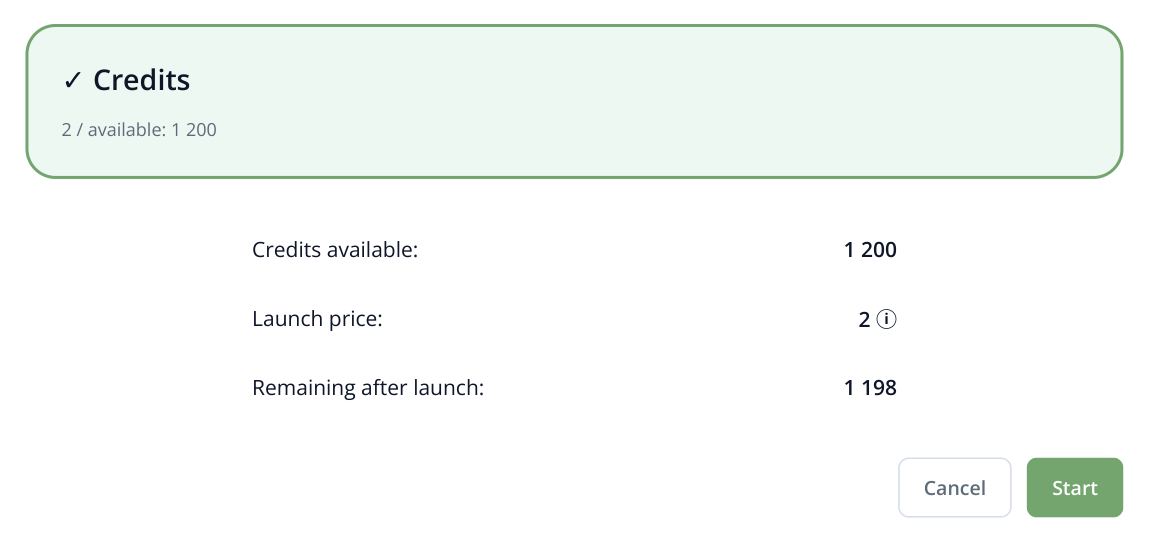
11. Part of the confirmation dialog with payment by credits selected. The figures are illustrative; Labrika calculates your cost and remaining balance for the current settings. The final action is “Start”.
When the run finishes, open “Price and availability monitoring” in the left menu. Select the completed run in “Report date” and find your URLs. Model A should show $399.90 and Model B $429.90. These are the baseline values for later comparisons.
If a field is empty or contains the old price, open the rule and test that product in the sandbox. Follow the chain: did the price load, what did the first match return, and is JavaScript enabled in the rule? Once both pages collect correctly, add more products from the store.
Choose checking times and a payment method
Open “Schedule settings” in the left menu. On “Change check schedule”, choose “Daily at selected hours”. Select the times below, such as 09:00 and 18:00; they become highlighted.
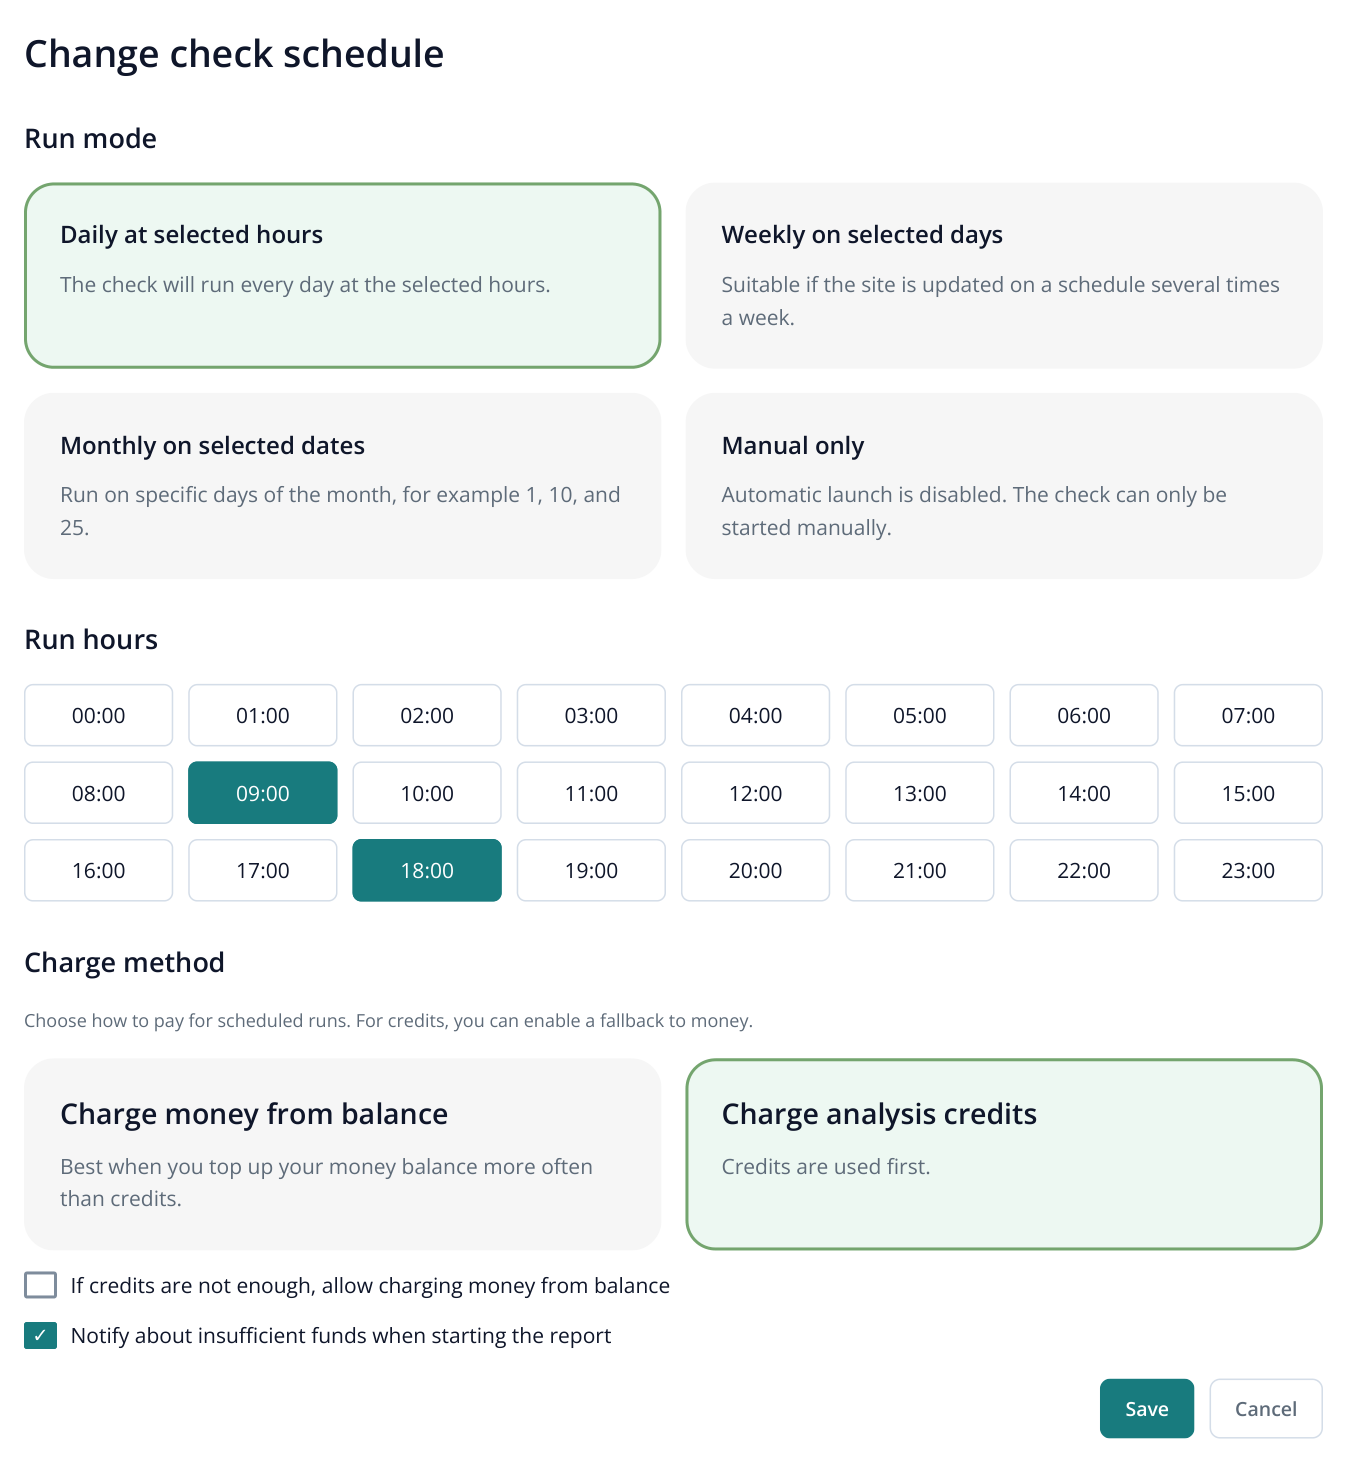
12. Daily scheduling: 09:00 and 18:00 are selected, with payment by credits and an insufficient-funds email. Fallback spending from the money balance is off. The illustration shows the settings form without schedule change history.
Under “Charge method”, choose money from your balance or analysis credits. For credit payments, you can separately allow money charges if credits run out. Enable “Notify about insufficient funds when starting the report” if needed, then click “Save”.
For personal shopping, start with morning and evening checks. A purchasing team may schedule collection before ordering time. Stores should choose a frequency that matches how quickly they need to respond to competitors. Emails follow completed analyses; monitoring does not observe the page continuously.
Review changes and use the results
Suppose Model A drops from $399.90 to $349.90 in the evening. Select the evening run in “Price and availability monitoring”. The “Price” cell shows the new value, change direction and a “previously” line.
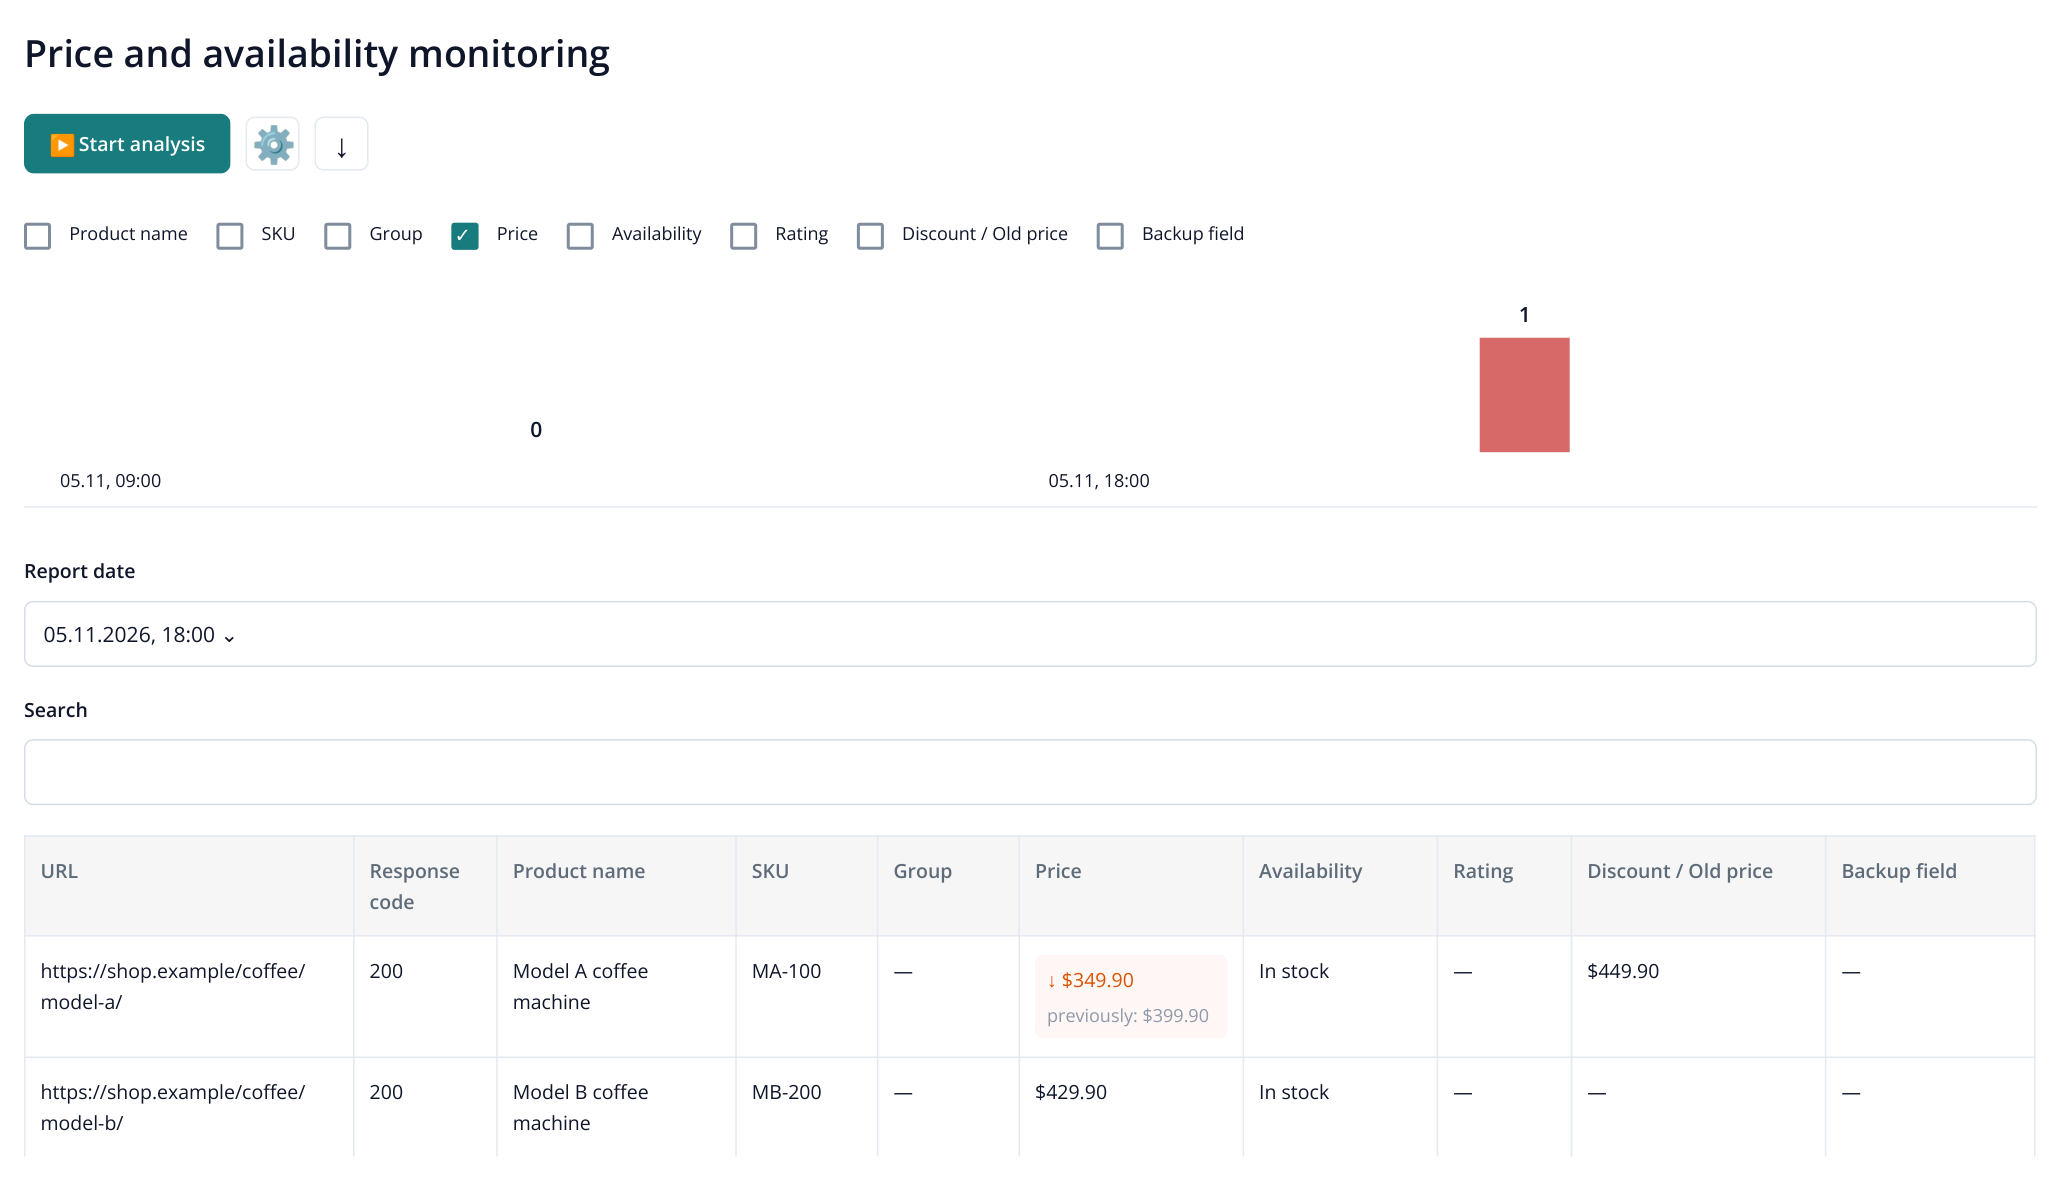
13. The evening check found one price change: Model A fell by $50. The example also collects name, SKU, availability and old price; unconfigured fields show a dash. The table scrolls horizontally.
The chart above the table shows how many tracked fields changed in each run. To investigate prices, leave “Price” enabled in the legend, select a run and review the product rows. The actual amounts are in the table; the chart does not plot one model's price over time.
A shopper can now open the product URL and check the configuration, delivery and final order total. A purchasing team can export the list using the download icon above the report, labeled “Export to XLSX”. The adjacent gear opens “Configure column names” if your team needs custom field names.
Stores can review the same report by SKU: where competitors cut prices, where products went out of stock and where bundles changed. A manufacturer can give its partner manager specific dealer URLs with price changes. Compare equivalent products and terms; collecting names, SKUs and availability preserves this context in the export.
Control costs by adding the product pages you need and choosing a suitable frequency. Labrika shows the cost of your check before launch; screenshots are not required for simple price collection.